Roles
About Roles
Roles in DIAL are used to enable roles-based access to resources (applications, models, files, conversations, and prompts) and also for cost control. Here are the key aspects of roles in DIAL:
- Resource Access Control: Roles determine who can use specific resources like AI models or applications. For instance, you can grant "operator" users access to the "chat-gpt-35-turbo" model.
- Usage Limits: Roles can enforce limits on resource usage, preventing overuse and abuse. You can set daily, weekly, or monthly token limits for specific roles using a model.
- Custom Application Logic: Developers can leverage roles within their applications to create custom behaviors. By accessing role information from user tokens, applications can tailor responses or restrict access to internal assets.
- System Feature Access: Roles manage access to system-level features, ensuring only authorized users have access. For example, only users with the "admin" role might be able to access the administration console.
- Refer to Access & Cost Control to learn more about how roles are used in DIAL.
- Refer to Tutorials to learn how to configure roles for API keys.
- Refer to Tutorials to learn how to configure roles for JWT.
- Refer to IDP Configurations to learn about the supported identity service providers and how to configure them.
Roles List
In Roles, you can define and manage roles in DIAL.
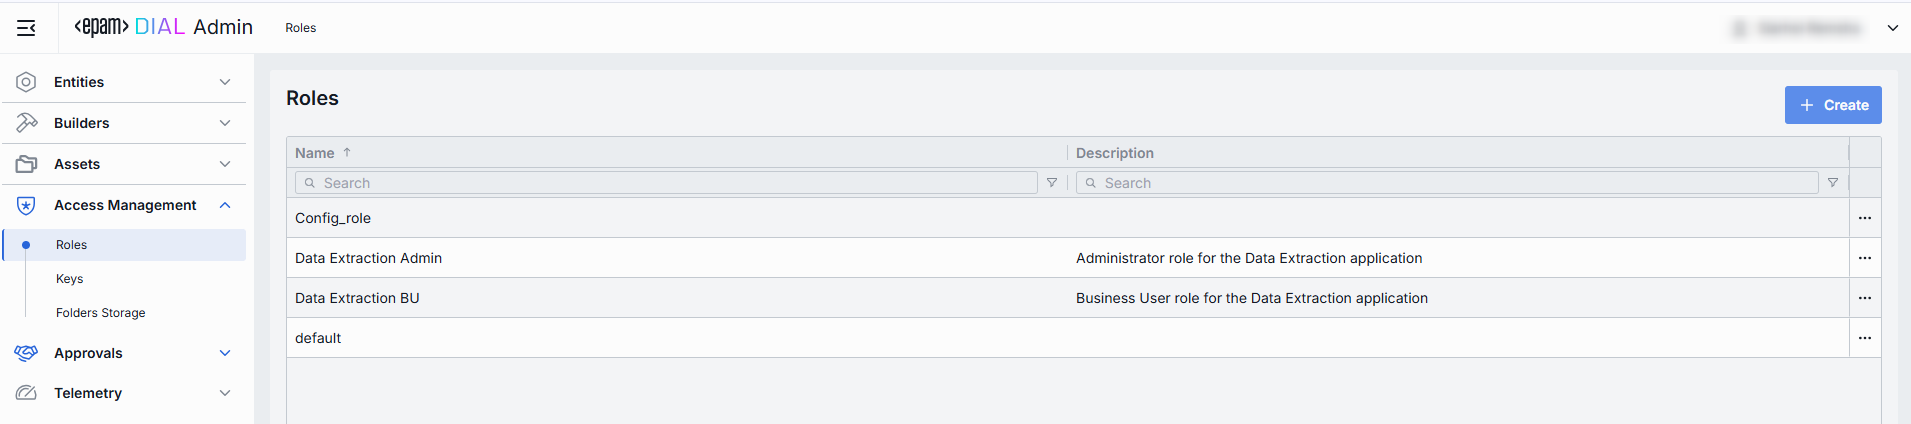
Roles Grid
| Column | Definition & Use Case |
|---|---|
| Name | A unique, user-friendly identifier of a role (e.g. Data Extraction Admin, Analysts, Business User). |
| Description | A free-form description of a role (e.g. "Business User role for the Data Extraction application"). |
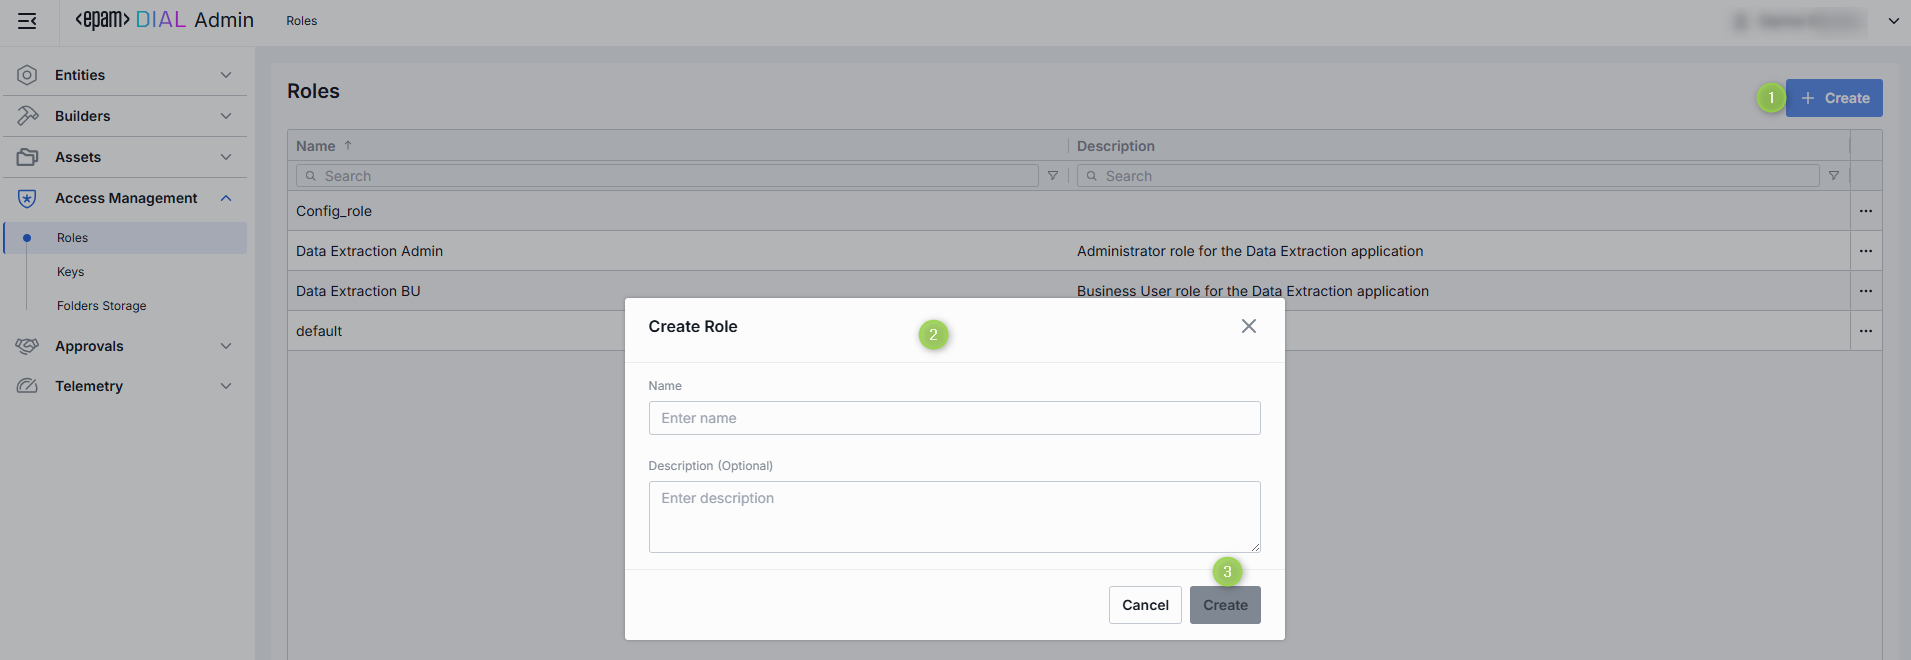
Create Role
-
Click Create to invoke the Create Role modal.
-
Define role's parameters:
Column Definition & Use Case Name A unique, user-friendly identifier of a role (e.g. Data Extraction Admin, Analysts, Business User). Description A free-form description of a role (e.g. "Business User role for the Data Extraction application"). -
Once all required fields are filled, click Create. The dialog closes and the new role configuration screen is opened. A new role entry will appear immediately in the listing once created.
Role Configuration
Top Bar Controls
- Delete: Permanently removes the selected role.
- JSON Editor (Toggle): Switch between the form-based UI and raw JSON view of the role's configuration. Use JSON mode for copy-paste or advanced edits.
Properties
In the Properties tab, you can define the identity and metadata for the role. These settings determine how the role appears throughout DIAL and help administrators understand its purpose.
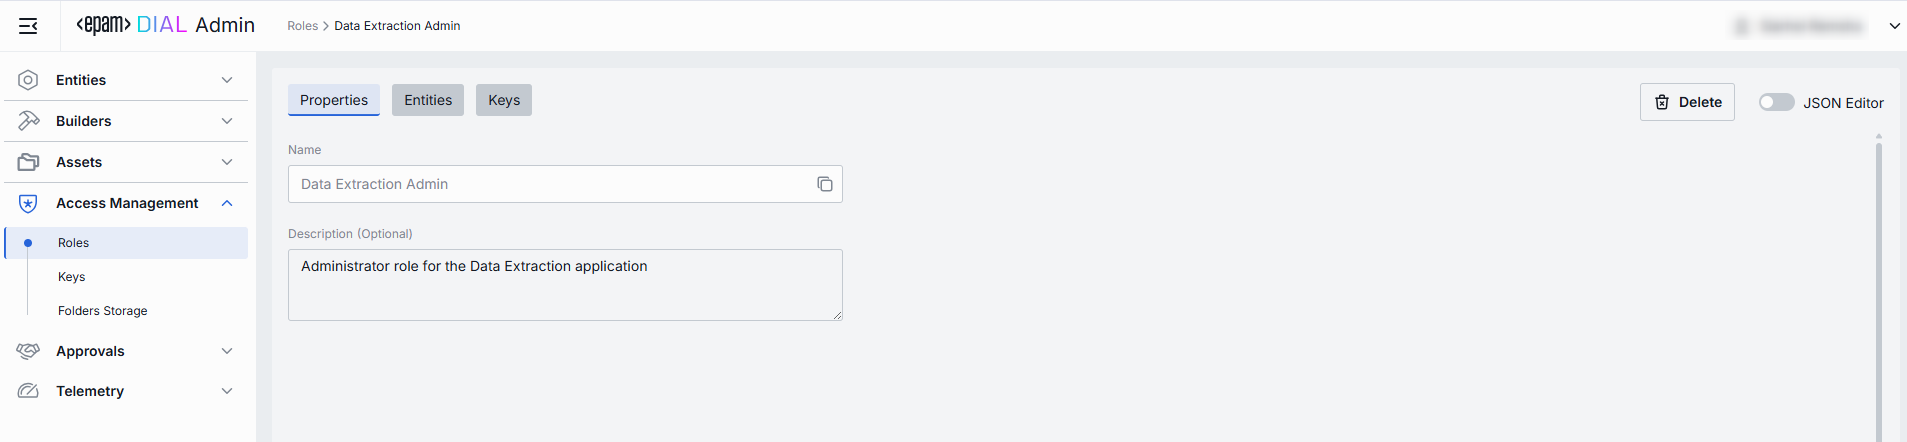
| Field | Required | Description |
|---|---|---|
| Name | Yes | A unique identifier of the role, used in ACL selectors and in API calls. |
| Description | No | Optional free-form text describing the role’s intended audience or use. |
Entities
In the Entities tab, you can assign which Models, Applications or Routes this role can access, and within which rate limits.
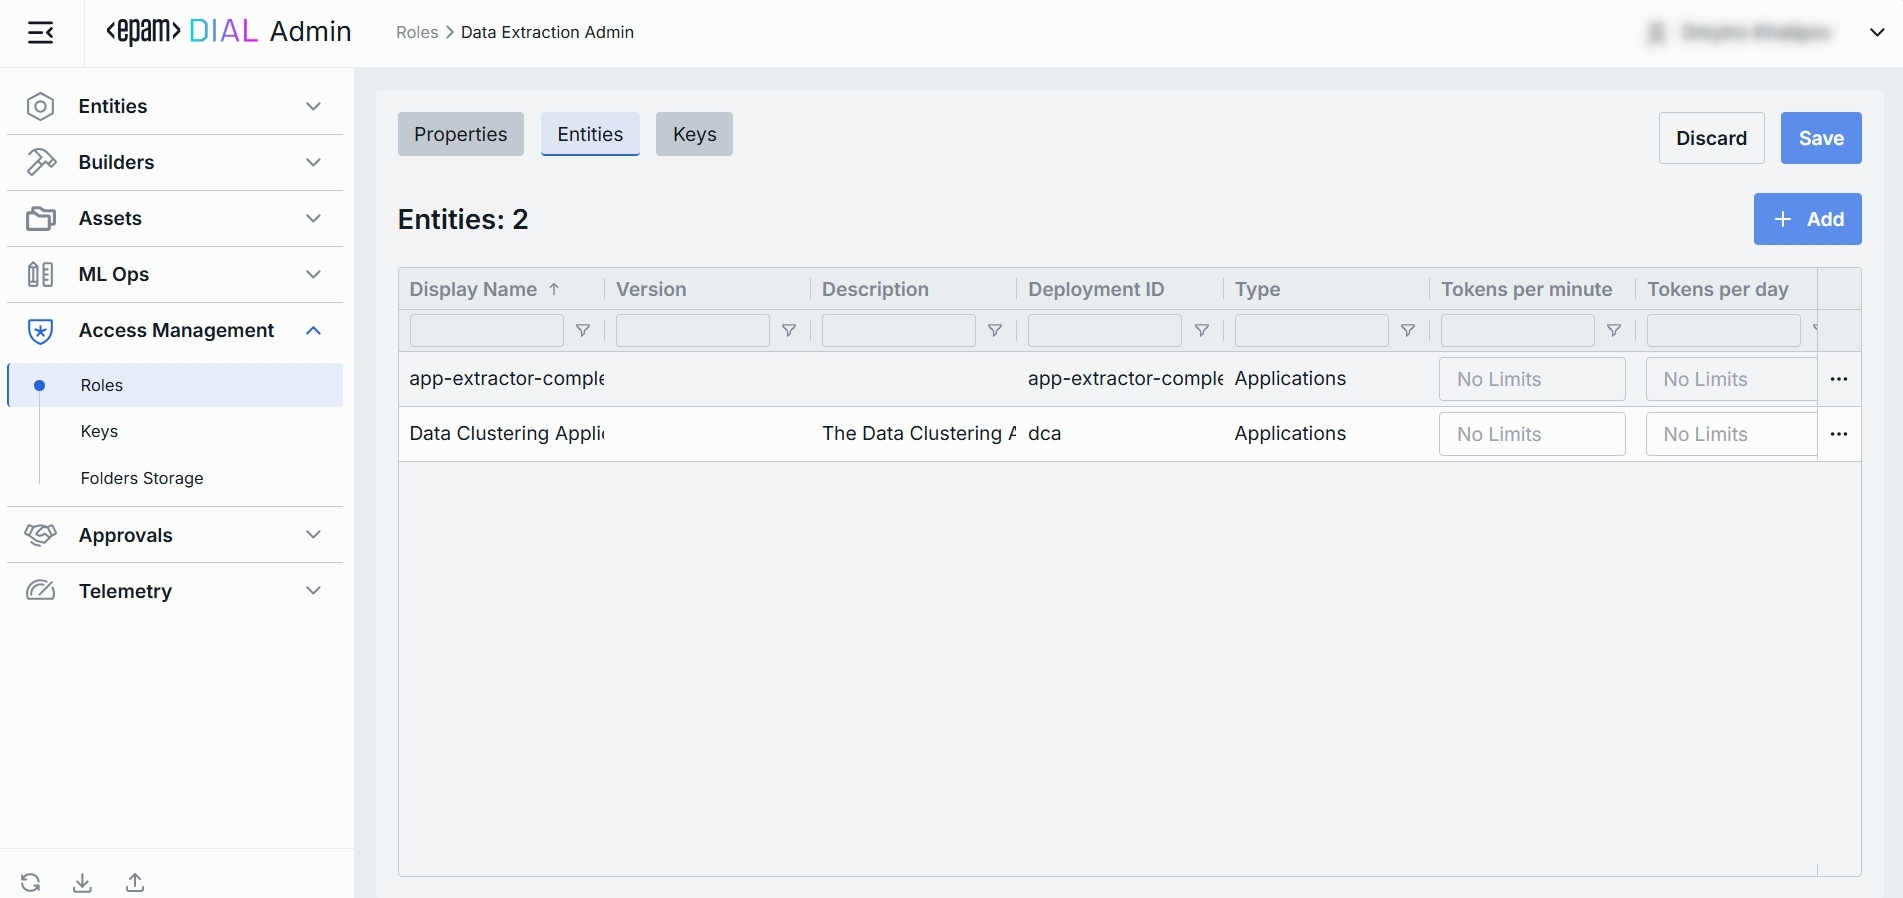
| Column | Definition |
|---|---|
| Display Name | A user-friendly name of the resource (Model, Application, or Route) as shown in DIAL. |
| Version | Version tag of the resource (e.g. v1.2, 1.0.0). |
| Description | A brief description of the resource. |
| Deployment ID | A unique internal identifier used by DIAL to call the resource's endpoint. |
| Type | Resource category: one of Models, Applications or Routes. |
| Tokens per minute | Maximum number of tokens this role may consume per minute when calling this resource. "Unlimited" if no limit is set. |
| Tokens per day | Maximum number of tokens this role may consume per day when calling this resource. "Unlimited" if no limit is set. |
| Tokens per week | Maximum number of tokens this role may consume per week when calling this resource. "Unlimited" if no limit is set. |
| Tokens per month | Maximum number of tokens this role may consume per month when calling this resource. "Unlimited" if no limit is set. |
Add
- Click + Add (top-right of the Entities Grid).
- Select one or more applications/models in the modal window.
- Confirm to insert them into the table.
Remove
- Click the actions menu in the entity's line.
- Choose Remove in the menu.
Keys
In the Keys tab, you can assign API keys for roles. API keys are defined in the Access Management → Keys section.
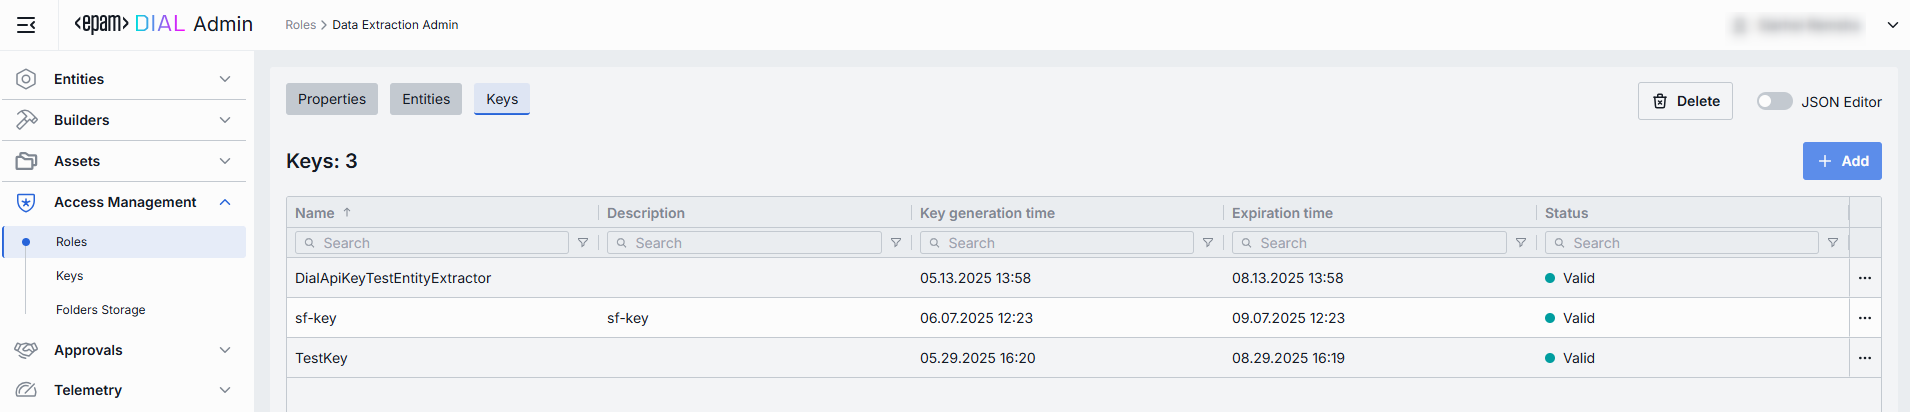
| Column | Definition |
|---|---|
| Name | A user-friendly identifier for an API key. Typically, reflects the intended consumer or purpose (e.g. mobile-sdk-key, data-extraction-worker). |
| Description | An optional free-text notes about this key’s purpose or scope. |
| Key generation time | A key's creation timestamp. |
| Expiration time | A key's expiration timestamp. Blank means no expiration (i.e. permanent until manually revoked). |
| Status | The current state of the key. |
Add
- Click + Add (top-right of the Keys Grid).
- Select one or more keys in the modal. Available API keys are defined in the Access Management → Keys section.
- Confirm to insert them into the table.
Remove
Use to revoke an assigned API key. To delete API key, go to Access Management → Keys section.
- Click the actions menu in the key's line.
- Choose Remove in the menu.
JSON Editor
For advanced scenarios of bulk updates, copy/paste between environments, or tweaking settings not exposed in the form UI—you can switch to the JSON Editor in any role's configuration page.
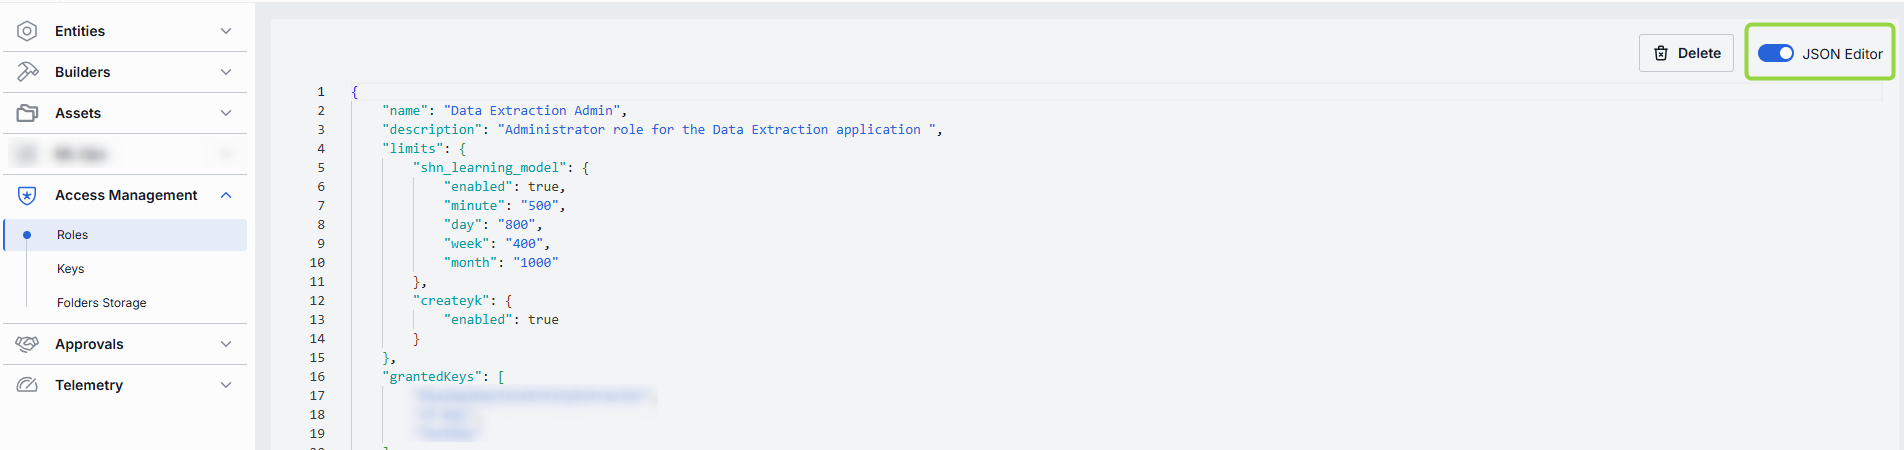
Switching to the JSON Editor
- Navigate to Access Management → Roles, then select the role you want to edit.
- Click the JSON Editor toggle (top-right). The UI reveals the raw JSON.
TIP: You can switch between UI and JSON only if there are no unsaved changes.