Interceptors
About Interceptors
You can add an additional logic into the processing of every request and response for models and apps, enabling PII obfuscation, guardrails, safety checks, and beyond. This is achieved through the integration of pluggable components known as Interceptors.
Refer to Interceptors to learn more.
Interceptors List
In Interceptors, you can find, manage and add interceptors.
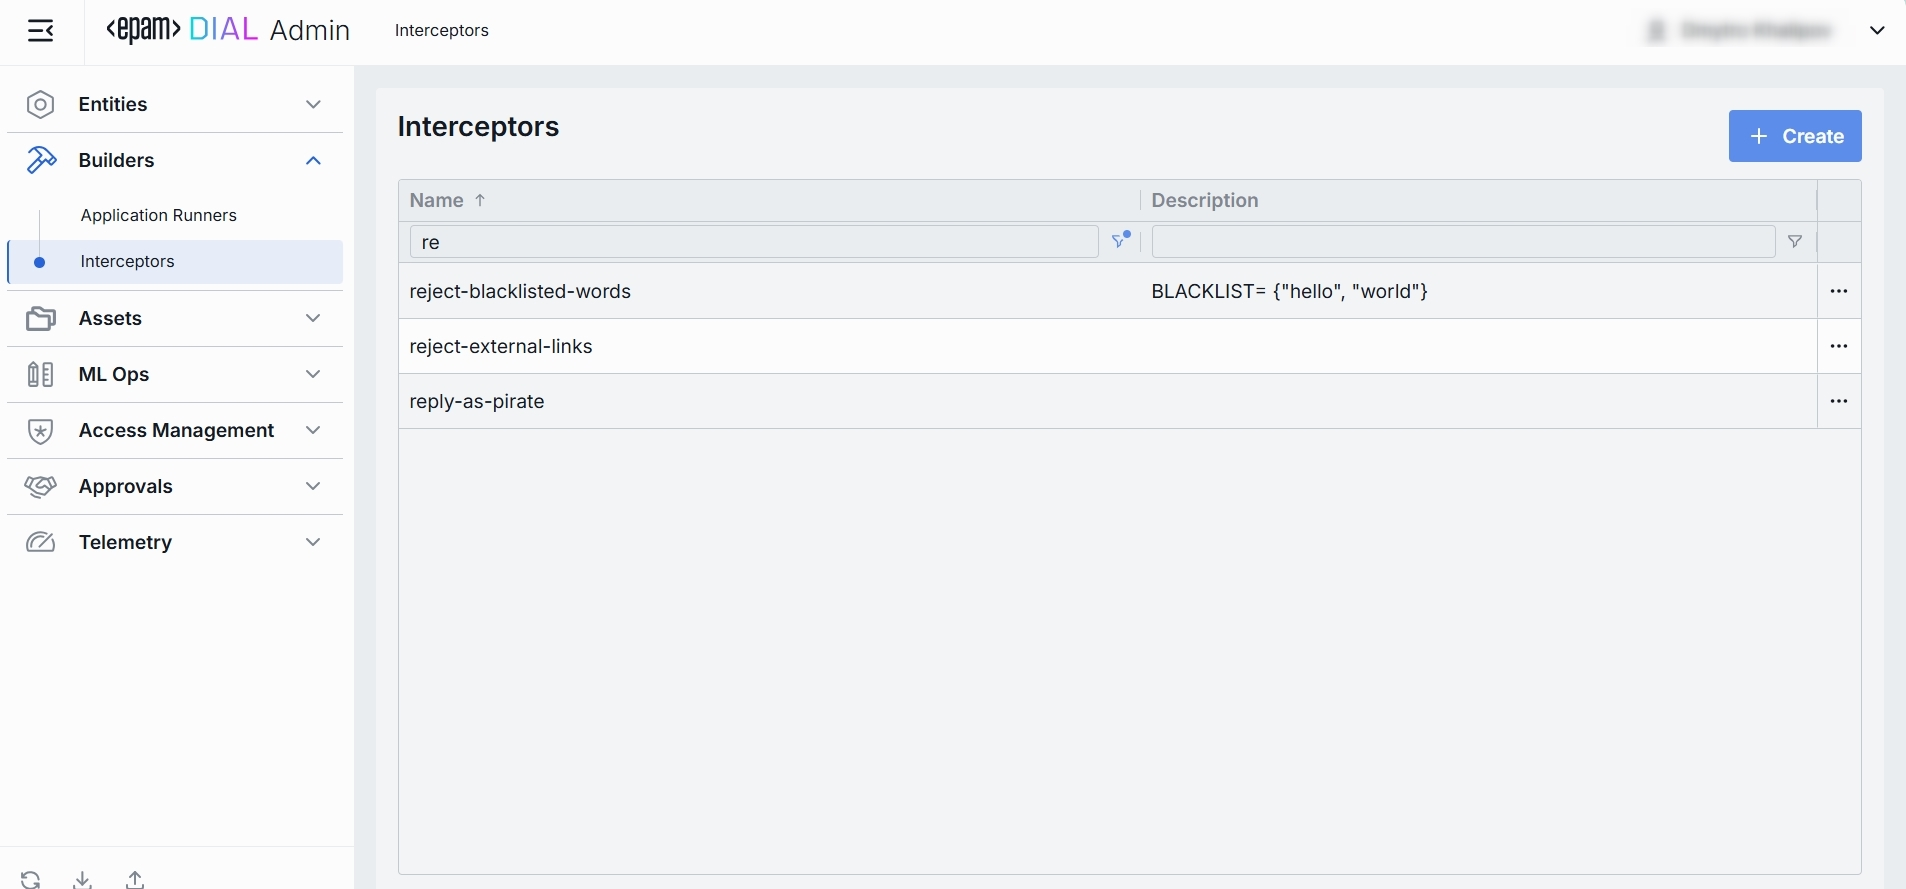
Interceptors Grid
| Column | Definition & Use |
|---|---|
| Name | A unique identifier for the interceptor (e.g. reject-blacklisted-words, audit-logger). This key is used when you attach it to a Model or Application. |
| Description | A brief summary of what this interceptor does and any parameters it uses (e.g. BLACKLIST=bar or Logs request/response payloads). |
Create
-
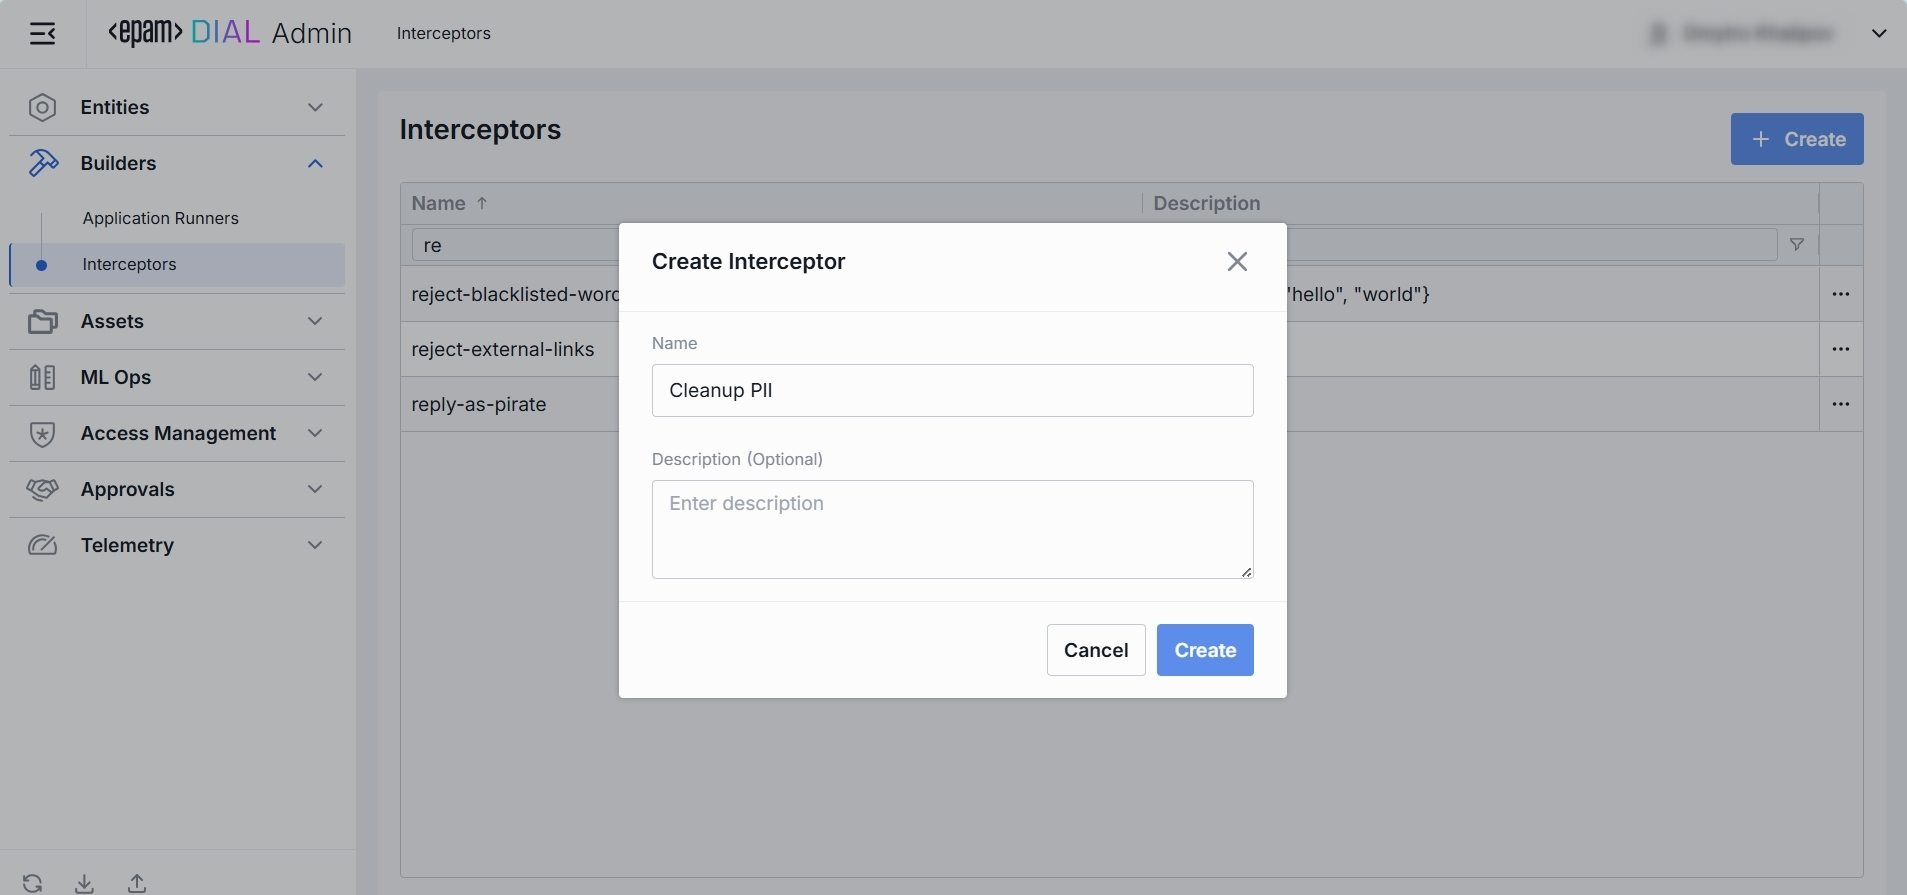
Click + Create to invoke the Create Interceptor modal.
-
Define interceptor's parameters:
Column Definition & Use Name A unique identifier of the interceptor (e.g. reject-blacklisted-words, audit-logger). This key is used when you attach it to a Model or Application. Description A brief summary of what this interceptor does and any parameters it uses (e.g. BLACKLIST=bar or Logs request/response payloads). -
Once all required fields are filled, click Create. The dialog closes and the new interceptor configuration screen is opened. Once added, a new entry appears in the Interceptors listing. It may take some time for the changes to take effect after saving.
Configuration
Top Bar Controls
- Delete: Permanently removes the selected interceptor.
- JSON Editor (Toggle): Switch between the form-based UI and raw JSON view of the interceptor’s configuration. Use JSON mode for copy-paste or advanced edits.
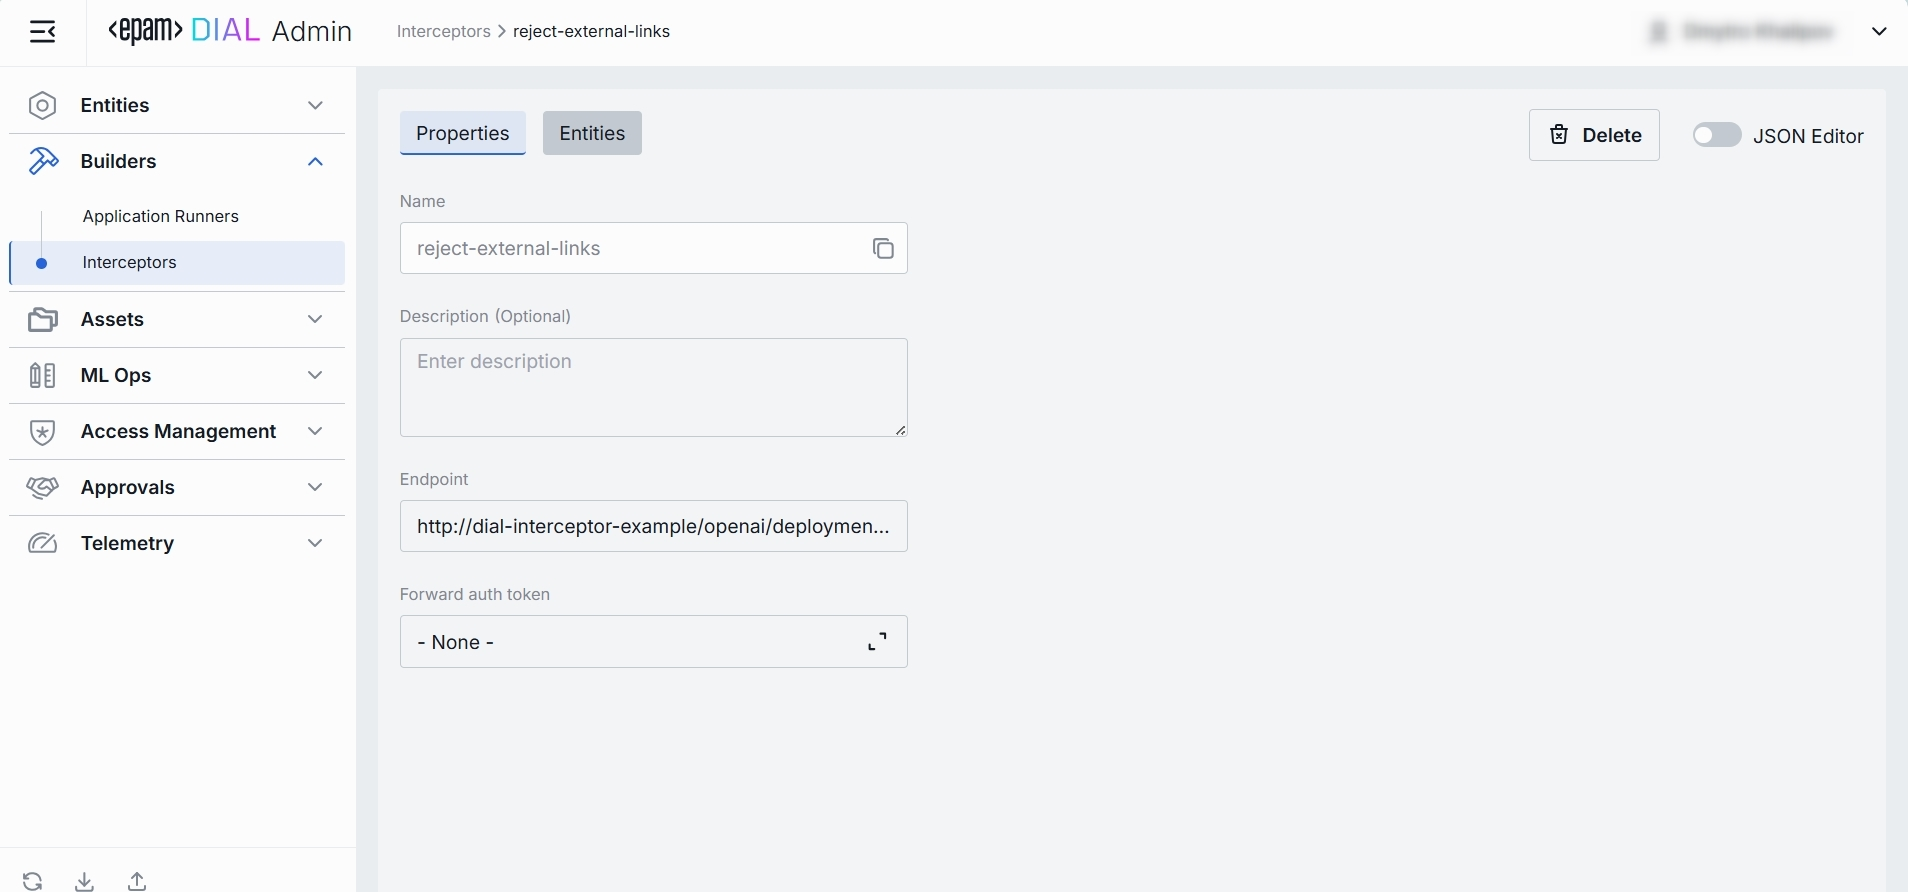
Properties
In the Properties tab, you can define metadata and execution endpoints for Interceptors.
| Field | Required | Definition & Use Case |
|---|---|---|
| Name | Yes | A unique key for this interceptor (e.g. reject-external-links, audit-logger). Used when attaching to Models or Applications under their Interceptors tab. Keep it URL-safe and lowercase with hyphens. |
| Description | No | A free-text summary of the interceptor’s behavior and any configuration parameters (e.g. BLACKLIST={"foo","bar"}). Helps to identify the interceptor and its purpose. |
| Endpoint | Yes | The URL of the interceptor service. This URL is used to handle requests and responses for the interceptor. |
| Forward Auth Token | No | Specify whether to forward an Auth Token to your interceptor's endpoint. Use this when your interceptor service requires its own authentication. |
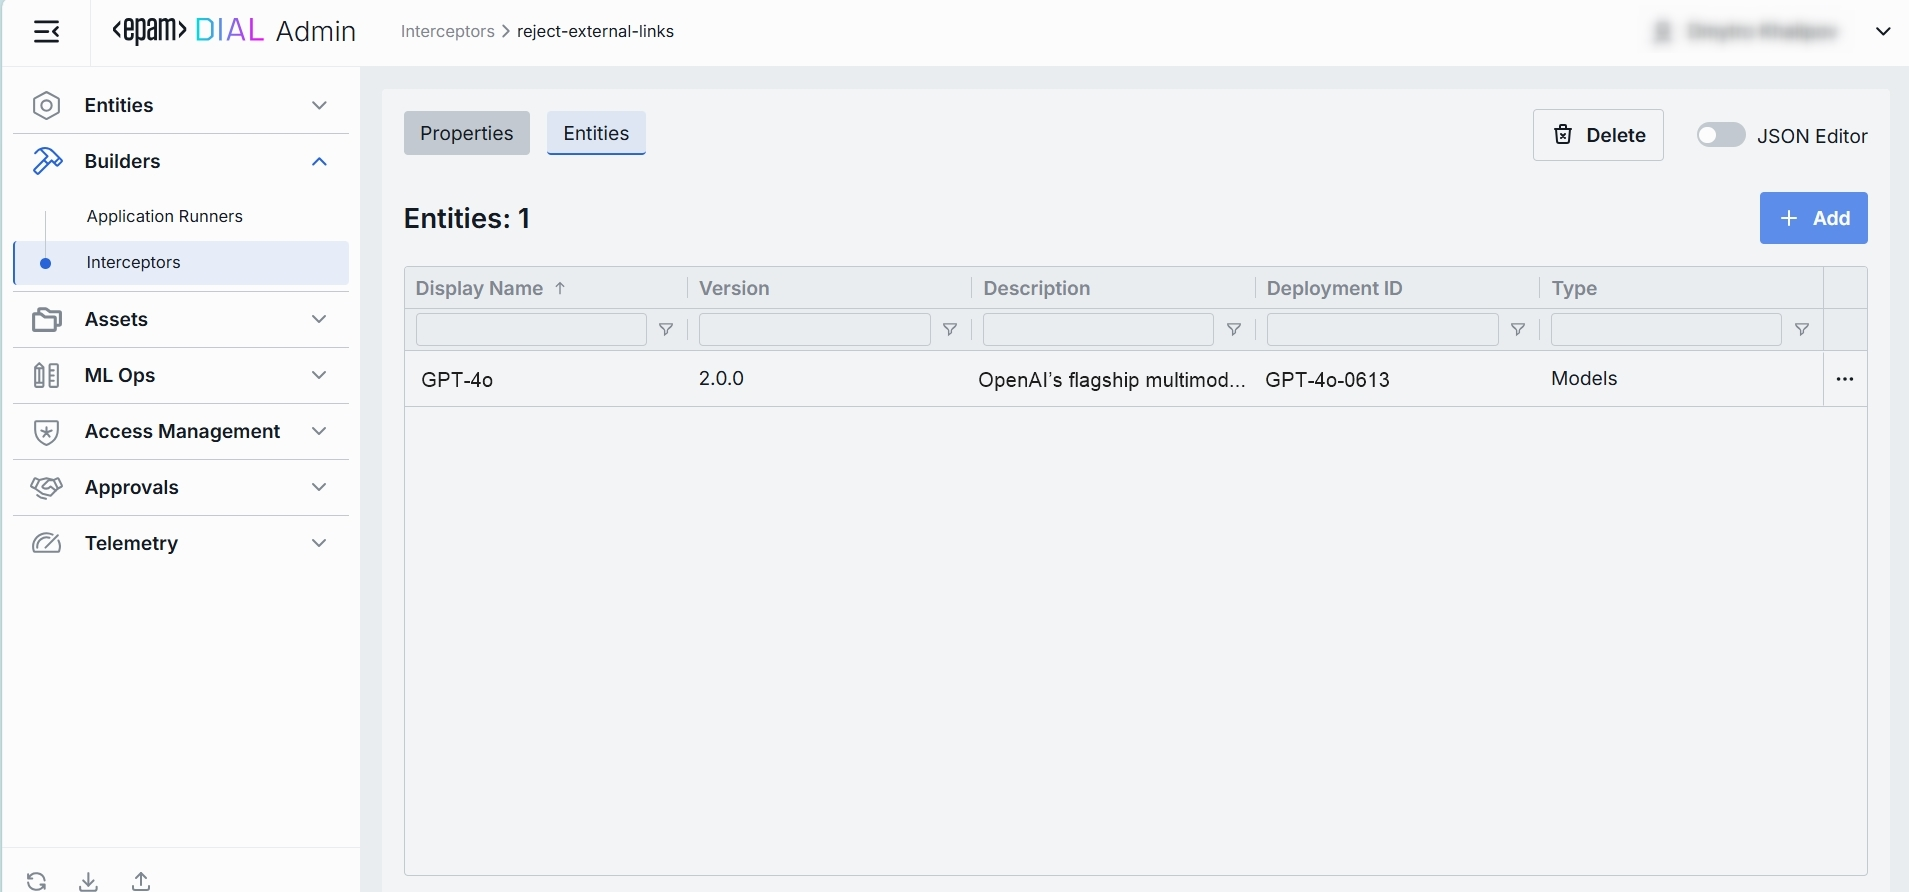
Entities
In the Entities tab, you can see to which Models and Applications this interceptor is currently attached. By binding interceptors here, you control exactly which AI endpoints (and in what order) will invoke your custom pre- or post-processing logic.
| Column | Definition |
|---|---|
| Display Name | A user-friendly name of the Application/Model (e.g. "Data Clustering Application"). |
| Version | The Application’s/Model's version tag (e.g. v1.0, 2024-07-15) as defined in Entities → Applications/Models → Properties. |
| Description | Free-text summary of what the Application/Model does. |
| Deployment ID | A unique alias used in the Application’s/Models' endpoint URL (e.g. dca, support-bot). |
Add
- Click + Add (top-right of the Entities Grid).
- Select one or more apps/models in the modal.
- Confirm to insert them into the table.
Remove
- Click the actions menu in the entity's line.
- Choose Remove in the menu.
JSON Editor
For advanced scenarios of bulk updates, copy/paste between environments, or tweaking settings not exposed in the form UI—you can switch to the JSON Editor in any interceptor configuration page.

Switching to the JSON Editor
- Navigate to Builders → Interceptors, then select the interceptor you want to edit.
- Click the JSON Editor toggle (top-right). The UI reveals the raw JSON.
TIP: You can switch between UI and JSON only if there are no unsaved changes.