Files
Files in DIAL are arbitrary binary or text assets (JSON, CSV, PDF, images, etc.) that AI models and applications can reference at runtime. Files added by users are stored in each user's private folder. They become available to other users and applications when published with applications and conversations that reference them, or via the Publication API.
DIAL can be configured to store files in the BLOB storage of your selected cloud provider, ensuring scalability and security.
Note
Files are a protected resource. Refer to Access Control to learn how protected resources are handled in DIAL.
Main screen
The main screen displays all files located in the Public folder.
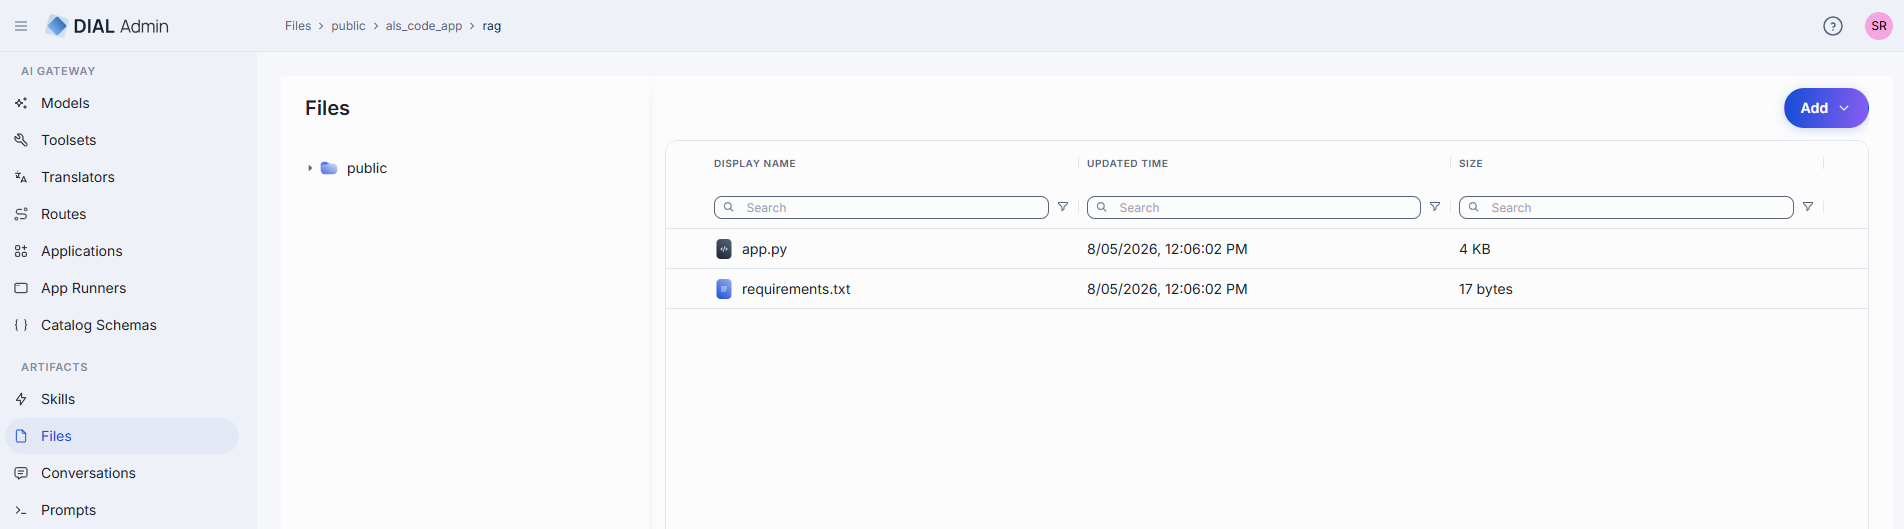
Click any folder to display its contents (files and sub-folders).
| Column | Description |
|---|---|
| Display Name | File name displayed on the UI. |
| Updated Time | Timestamp of the last file update. |
| Size | File size in kilobytes. |
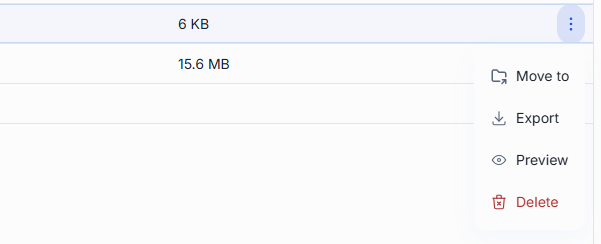
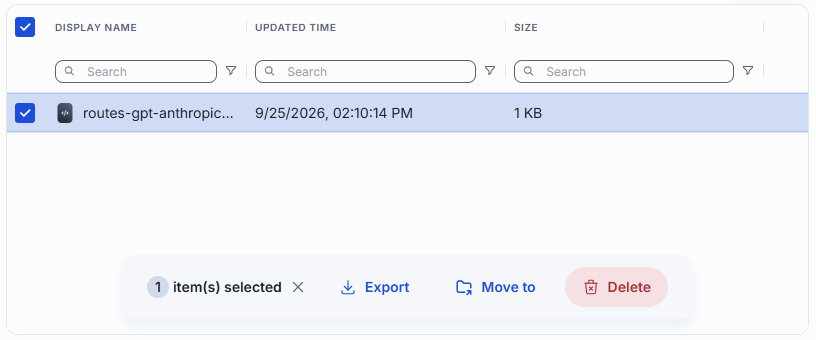
Click any file (or select several files) to see the context menu with available actions:
| Action | Description |
|---|---|
| Move to | Move the selected file(s) to another folder. |
| Export | Download a ZIP archive with the selected file(s). |
| Preview | Preview the content of the file. Enabled for: .html, .htm, .css, .js, .mjs, .json, .xml, .txt, .md, .csv, .jpg, .jpeg, .png, .gif, .webp, .svg, .ico, .bmp, .avif, .mp3, .wav, .ogg, .mp4, .webm, .pdf. |
| Delete | Delete file(s). Any models or applications that reference a deleted file will stop working until a valid file is reattached. |
Export files
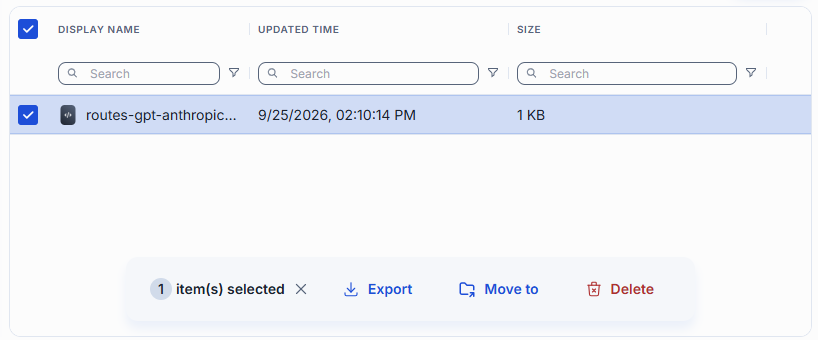
You can download selected files or folders as a ZIP archive.
Make a selection and click Export in the toolbar. The Export button is also available in the context menu of each file or folder.
Add a folder
Use folders to organize the Public folder. The Add dropdown in the toolbar adds new folders or files.

- Open the folder where the new folder should go.
- Click Add in the toolbar and select Folder. A new folder appears in the list with the name New Folder ready to edit.
- Enter the folder name and confirm.
A folder name can be up to 160 characters, can't start with a dot, and can't contain the characters : ; , = / { } % & \ or ". Folders can be nested up to four levels, not counting the root. If you try to create a deeper folder, a notification shows the limit.
Folder actions
Open the context menu of a folder in the tree to work with it:
| Action | What it does |
|---|---|
| Add sibling | Creates a new folder next to this one, under the same parent. |
| Add child | Creates a new folder inside this one. |
| Move to | Moves the folder and its contents to another folder. |
| Export | Downloads the folder and everything in it as a ZIP archive. |
| Manage permissions | Opens the folder in Folders Storage in a new browser tab, where you set who can access it. |
| Rename | Renames the folder. |
| Delete | Deletes the folder and its contents. |
Folders can't be duplicated. The same actions are available for a file or folder row in the grid, except that a file can't be renamed.
Import files
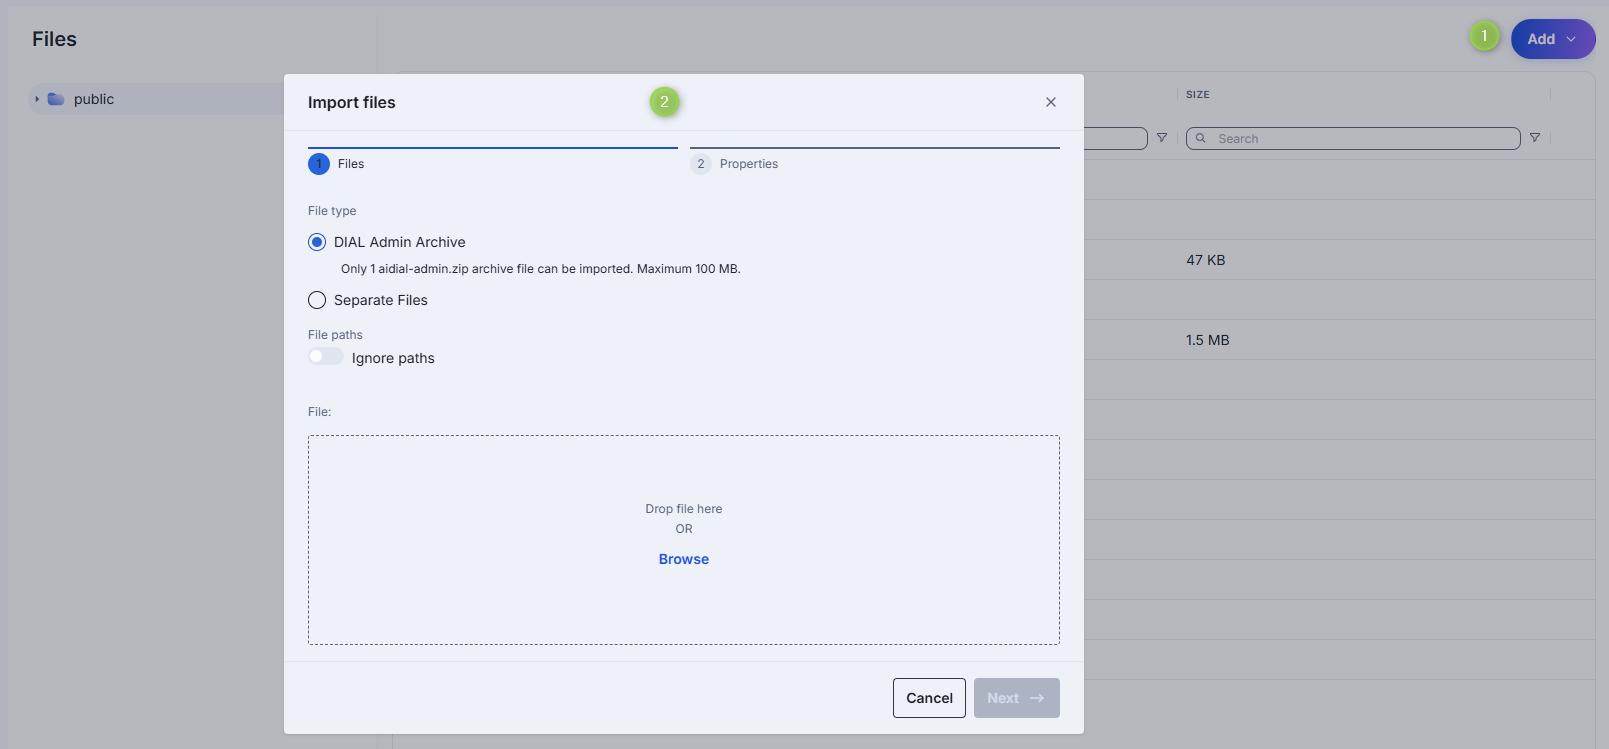
- Click Add in the toolbar and select Files to open the Import Files modal.
- Choose to import a ZIP archive or separate files:
- Separate files: up to 30 files at once. The total size must not exceed 100 MB.
- Archive: one
aidial-admin.ziparchive at a time, up to 100 MB.
- Enable Ignore paths to import all files directly into the root folder without recreating the original folder hierarchy.
- Add files by dragging them into the window or using the file browser.
- Click Next to select a conflict resolution strategy:
- Skip: Do not import conflicting files; keep existing files unchanged.
- Override: Replace files with the same name with the imported ones.
- Edit manually: Rename incoming files one by one to avoid conflicts. Conflicting files are flagged in red and become editable.
- Click Finish.
Delete files
There are several ways to delete a file:
Warning
Any applications that reference a deleted file will stop working until a valid file is reattached.
- Select one or more files or folders and click Delete in the toolbar.
- Use the Delete option in the file or folder context menu.
- Delete the folder in which the file is located.
Further reading
- DIAL Admin: Conversations — review published conversations
- DIAL Admin: Prompts — manage shared prompts
- DIAL Admin: Skills — manage reusable agent instructions
- File Manager — where uploaded and shared files live
- Folder Permissions — how the Public folder tree controls who sees shared items
- Access control reference — access patterns and ACLs for resources and Core APIs