Manage roles
This page explains how to create, configure, and delete roles in DIAL Admin. A role sets per-model token limits, cost limits, and sharing limits for a user group. You need administrator access to DIAL Admin to perform these tasks.
Note
Roles can also be defined directly in DIAL Core configuration. Roles defined in the configuration file appear in the file folder and are read-only in DIAL Admin. Roles you create in DIAL Admin are stored in the platform folder.
For background on how roles work in the platform, see Authentication and access control. To configure roles for API keys or JWT, see Roles and rate limits.
Roles grid
Navigate to Roles to see all roles defined in your DIAL instance.
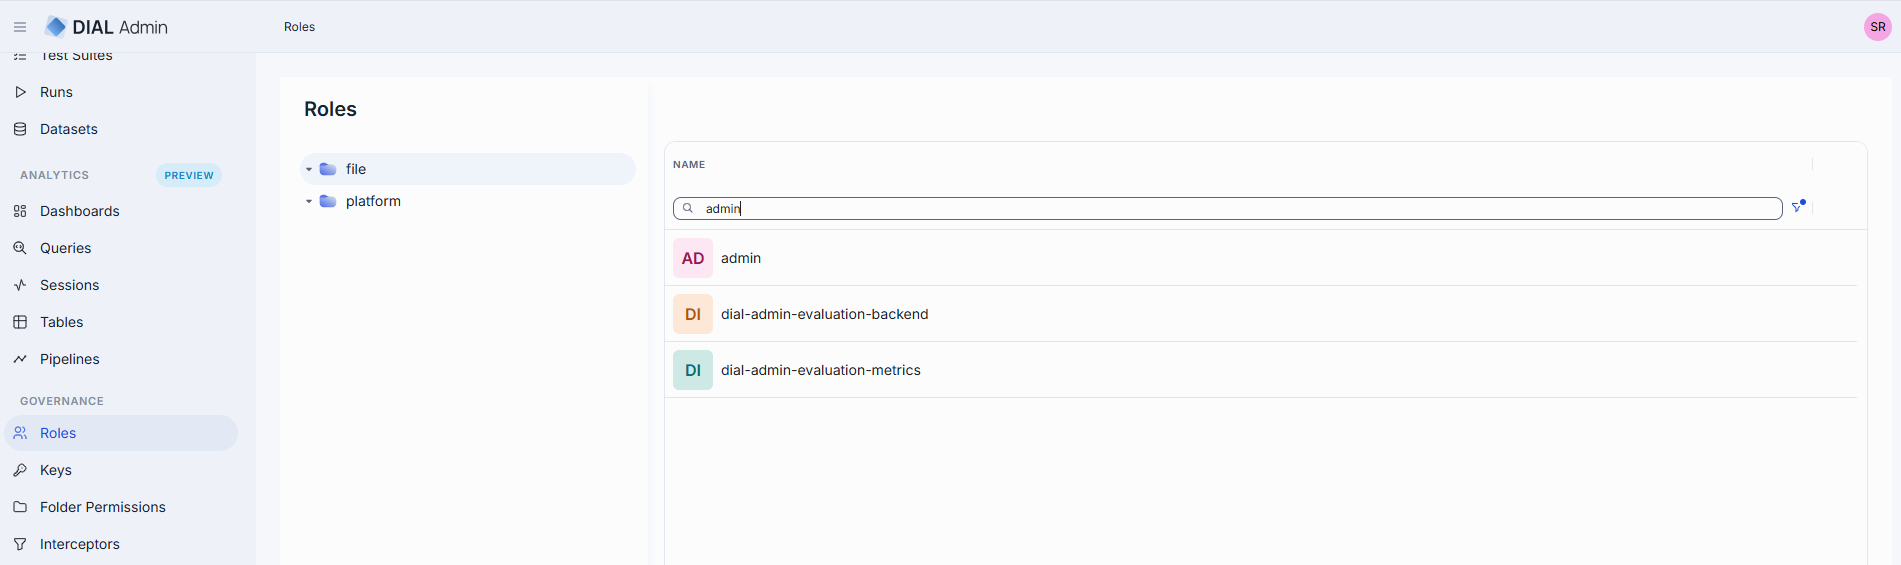
Folders
The left panel shows where each role definition is stored. It has two root folders:
- file: roles defined in the DIAL Core configuration file. This folder is read-only. To change these roles, edit the DIAL Core config file.
- platform: roles stored in DIAL Core platform storage. This is where you create, edit and delete roles in DIAL Admin.
Select a folder to list its roles in the grid. See AI Gateway for how DIAL Core combines the two sources, including what happens when a file role and a platform role have the same name.
| file folder | platform folder | |
|---|---|---|
| Columns | Name | Name, Author, Created Time, Updated Time |
| Create | Not available. No Create button. | Available. |
| Duplicate, Delete | Not available. | Available in the row's actions menu. |
| Open a role | Read-only: the role cannot be changed or saved. | Editable. |
| Entities tab | View only: no Add, Remove, Set unlimited, and limit values can't be edited. | Add, remove and edit entities and limits. |
Create
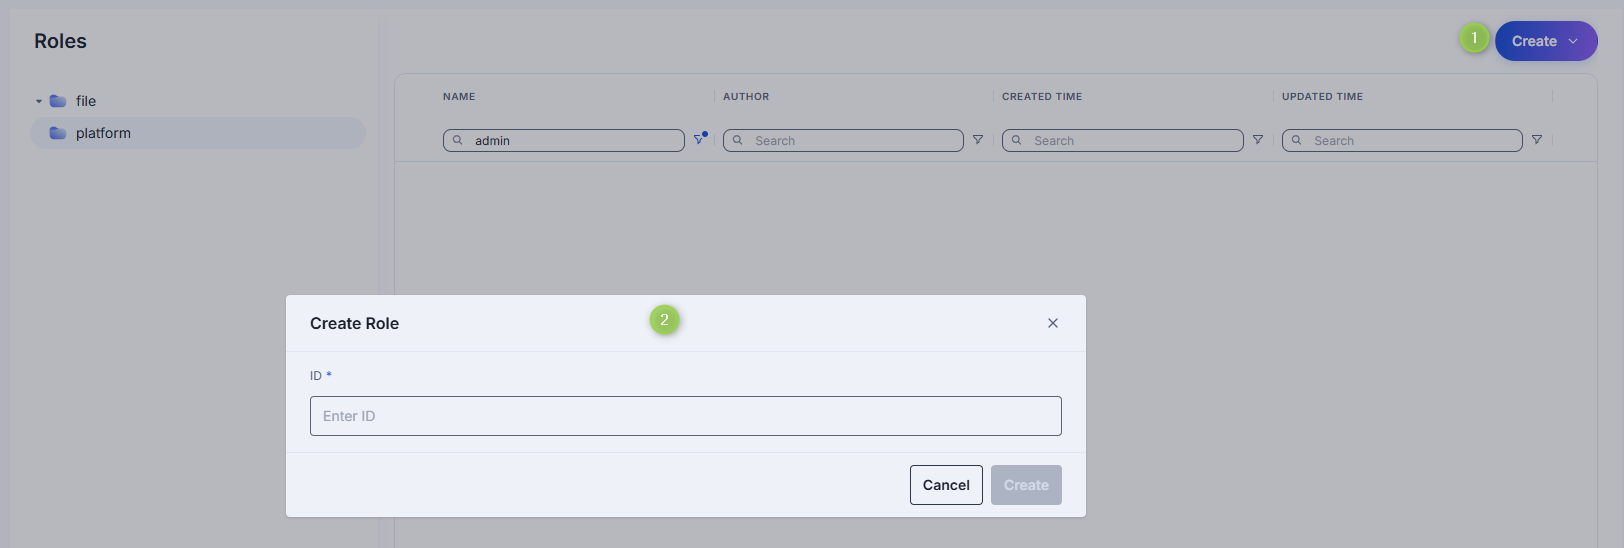
Select the platform folder first. Roles can't be created in the file folder.
-
Click Create to open the Create Role modal.
-
Enter a unique role identifier.
-
Click Create. The modal closes and the new role's configuration screen opens. The role appears immediately in the listing.
Delete
Click Delete in the role's actions menu on the main screen, or use the Delete button on the role's configuration screen, to permanently remove the selected role. Delete is available only for roles in the platform folder.

Configuration
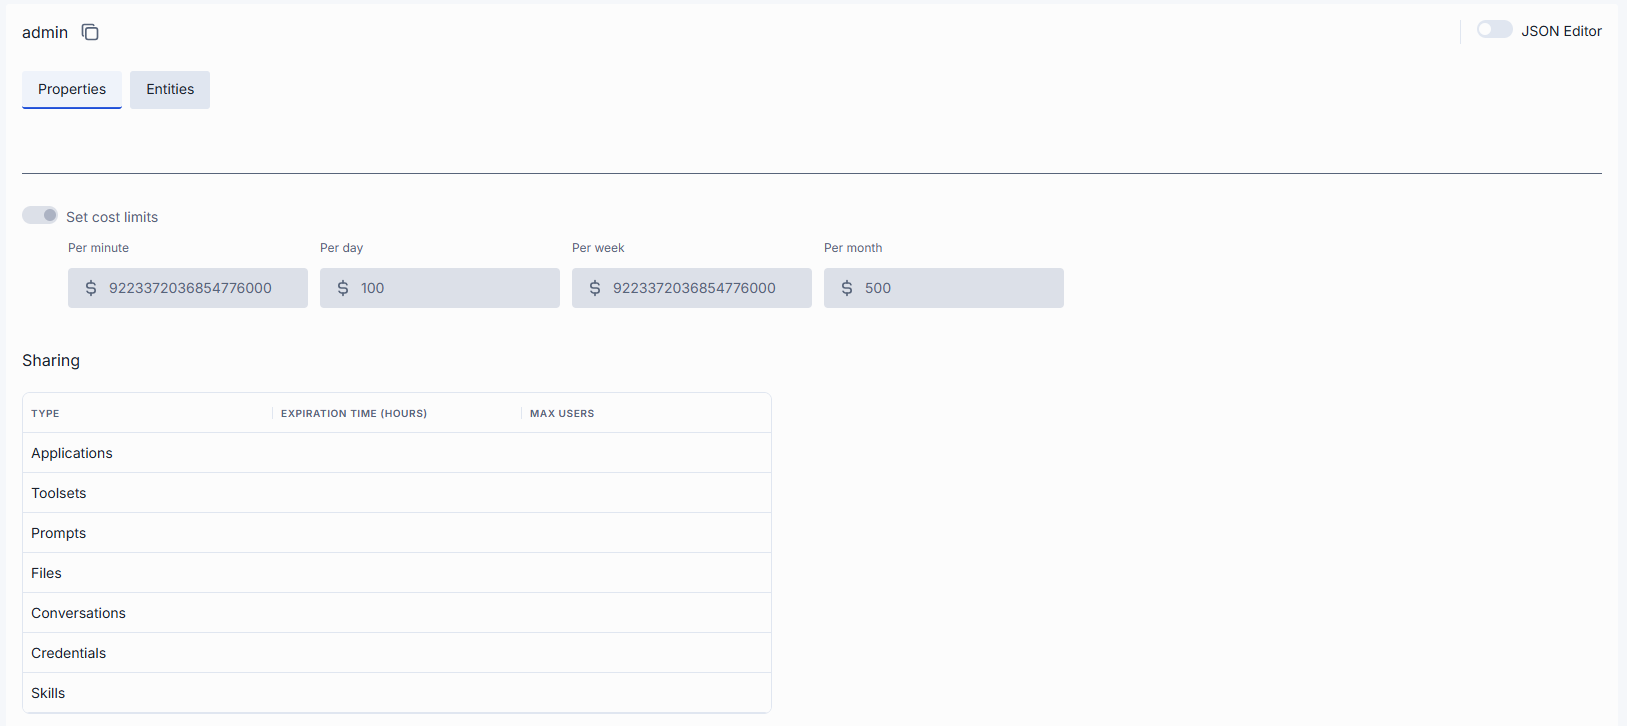
Click any role on the main screen to open its configuration screen. It has two tabs: Properties and Entities. Roles from the file folder open in read-only mode.
Properties
The Properties tab defines the identity and metadata for the role.
| Field | Required | Description |
|---|---|---|
| ID | — | Unique role identifier. |
| Maintainer | — | Role creator. |
| Updated Time | — | Last update timestamp. |
| Creation Time | — | Creation timestamp. |
| Set cost limits | No | Token usage limits for this role. Available periods: Tokens per minute, Tokens per day, Tokens per week, Tokens per month. If no limits are set for this role, the default role limits apply. If no default role limits are set, the value is unlimited. See DIAL Core documentation for all available options. |
| Sharing | No | Sharing limits for specific resource types. Expiration time sets the TTL of the sharing link (default: 72 hours). Max users sets the maximum number of users who can accept a sharing link (default: 10 for APPLICATION; unlimited for other resource types). See DIAL Core documentation for details. |
Entities
The Entities tab lists the models this role has token limits for. A model with empty limits is unlimited for this role.
| Column | Description |
|---|---|
| Name | Model name. |
| Tokens per minute | Maximum tokens this role may consume per minute when calling this model. |
| Tokens per day | Maximum tokens this role may consume per day when calling this model. |
| Tokens per week | Maximum tokens this role may consume per week when calling this model. |
| Tokens per month | Maximum tokens this role may consume per month when calling this model. |

| Action | Description |
|---|---|
| Add | Add a model to the role's limits. |
| Remove | Remove the model from the role's limits. |
| Set unlimited | Clear the token limits of the model. |
These actions are not available for roles in the file folder.
JSON editor
Advanced users can view and edit role properties as raw JSON. This is useful for bulk updates, copying configuration between environments, or modifying settings not exposed in the UI.
Tip
You can switch between UI and JSON only when there are no unsaved changes.
To use the JSON editor:
- Navigate to Roles, select the platform folder, and select the role you want to edit.
- Click the JSON Editor toggle (top-right). The raw JSON is revealed.
- Make your changes and click Save.
Roles in the file folder open read-only.
Further reading
- Manage API keys — create and rotate API keys, assign roles to keys
- Manage folders access — manage access to files in folders
- Set usage limits and cost control — attach token and spend caps to roles
- Configure roles and rate limits — define roles with request, token, cost, and sharing limits
- Authentication and access control — the access-control model: authentication, objects, and subjects
- Manage models — add models to a role's entity list