Back up, restore, and set global properties
This guide covers the system-wide tasks an administrator runs from the DIAL Admin home page: exporting configuration for backup or migration, importing it into another environment, defining global interceptors, and pinning the DIAL Core version. It is for administrators with write access to DIAL Admin. For an orientation to the panel, start with the Admin Panel overview.
Configuration import/export and manual Core-version selection depend on the optional Admin Backend. With direct Core access alone, those controls are unavailable; global properties still use Core directly. Deployments and Analytics can offer their own import/export scopes when enabled, even without Admin Backend. See Optional services for the connections required by each scope. For backups through Core itself, see the Configuration API export.
Export configuration
Use Export Config to download the full or selected configuration of the current instance — useful for backups, audit snapshots, or sharing with teammates.

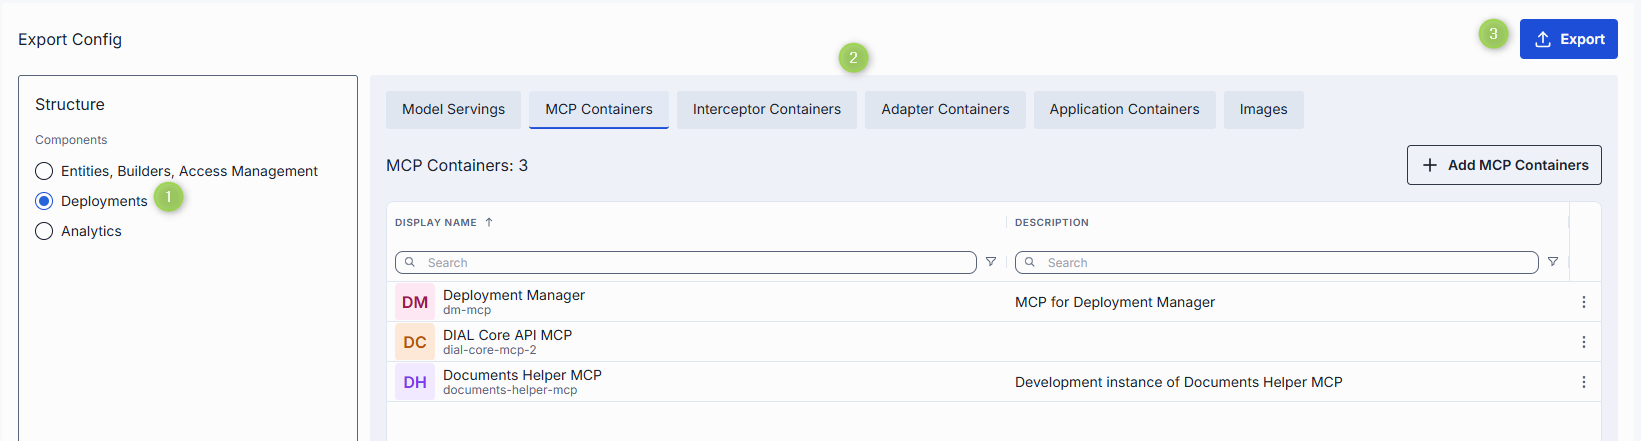
Export deployments
Export the configuration of selected deployments (model servings, images, MCP, interceptor, and adapter containers).
- Click Export config and select Deployments under Components.
- Add the deployments you want to export. You can choose to ignore or include the dependencies the selected resources need to operate.
- Click Export to open the Export File Preview window.
- Enable Include secrets to include secret values (keys, passwords, and similar) in the deployment configuration.
- Enable Include global firewall to include the global domain whitelist in the configuration file.
- Click Export to download a
.ziparchive.
Export entities, Builders, and access management
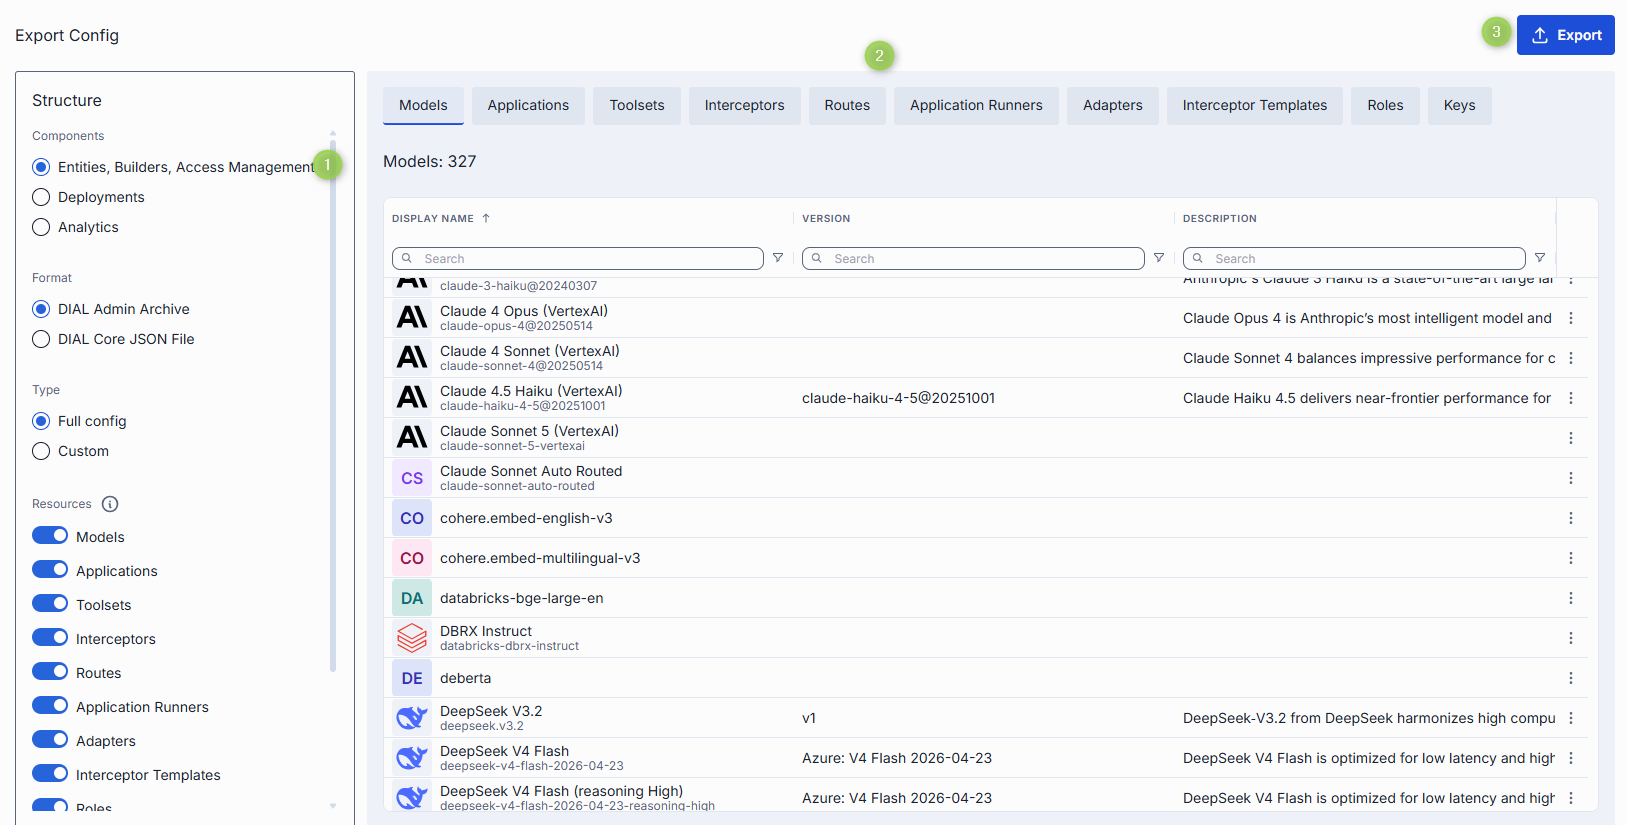
Export the configuration of selected entities (models, applications, toolsets, interceptors, routes), Builders (application runners, adapters, interceptor templates), and access management configuration (API keys and roles).
- Click Export config and select Entities, Builders, Access Management under Components.
- Choose the export format:
- DIAL Admin Archive — a
.ziparchive. - DIAL Core JSON File — a single
.jsonfile compatible with DIAL Core.
- DIAL Admin Archive — a
- Choose the export type:
- Full — use the Resources toggles to enable or disable specific resource categories.
- Custom — use the resource tabs to manually select which entities to include. With a custom export, you can include or ignore dependencies (adapters, interceptors, applications, application runners, and similar) that the selected resources need.
- Use Topics to filter resources by associated topic.
- Click Export to open the Export File Preview window, where you can preview your selections and any included dependencies, and enable Include secrets.
- Review your selection and click Export to download a
.ziparchive.
Import configuration
Use Import Config to upload a configuration file when migrating between environments or restoring a backup.

-
Click Import Config to open the import screen.
-
In the Files section, make the following selections:
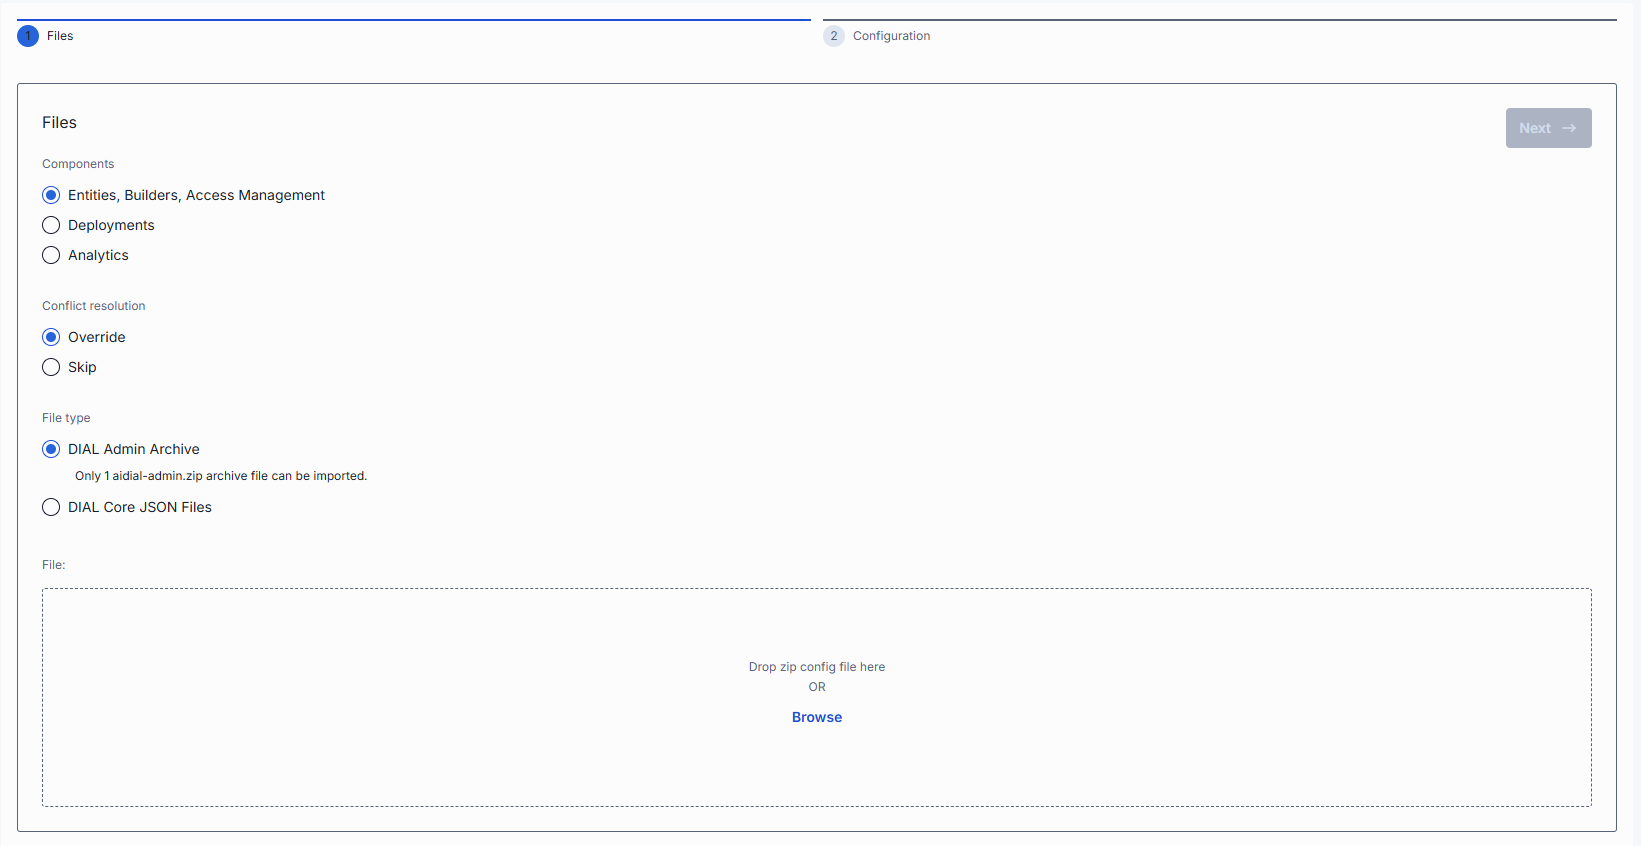
- Components — choose to import the configuration of deployments (model servings, images, MCP, interceptor, and adapter containers), entities (models, applications, toolsets, interceptors, routes), Builders (application runners, adapters, interceptor templates), and access management (API keys and roles).
- Conflict resolution — choose a strategy for conflicts between imported and existing files:
- Override — any resource in the archive that matches an existing one by identifier replaces it.
- Skip — any resource in the archive that matches an existing one by identifier is ignored, and the current resource is unchanged.
- File type — choose to import a DIAL Core
.jsonfile or a.ziparchive.
-
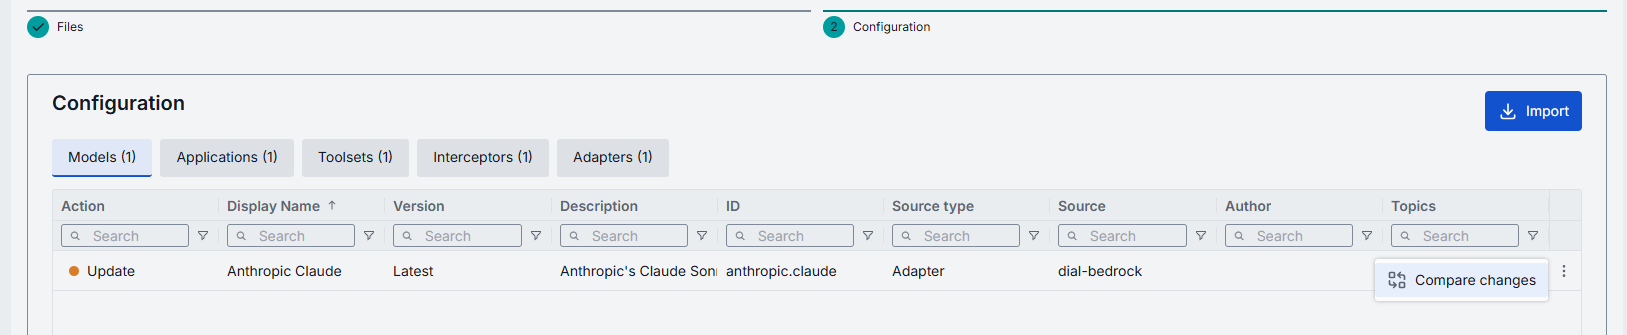
Add a file or archive in the Files section, then continue to the Configuration step to preview all resources being imported. Resources with validation errors (such as schema mismatches or uniqueness conflicts) are flagged in the preview before import begins. When the archive includes a global firewall configuration, firewall validation errors are grouped by domain for easier review.
-
For each resource, click Compare changes in the actions menu to compare the current version with the version to be imported.

-
Click Import to start the import.
Note
Import and export controls are disabled for read-only administrators. See Read-only access.
Set global interceptors
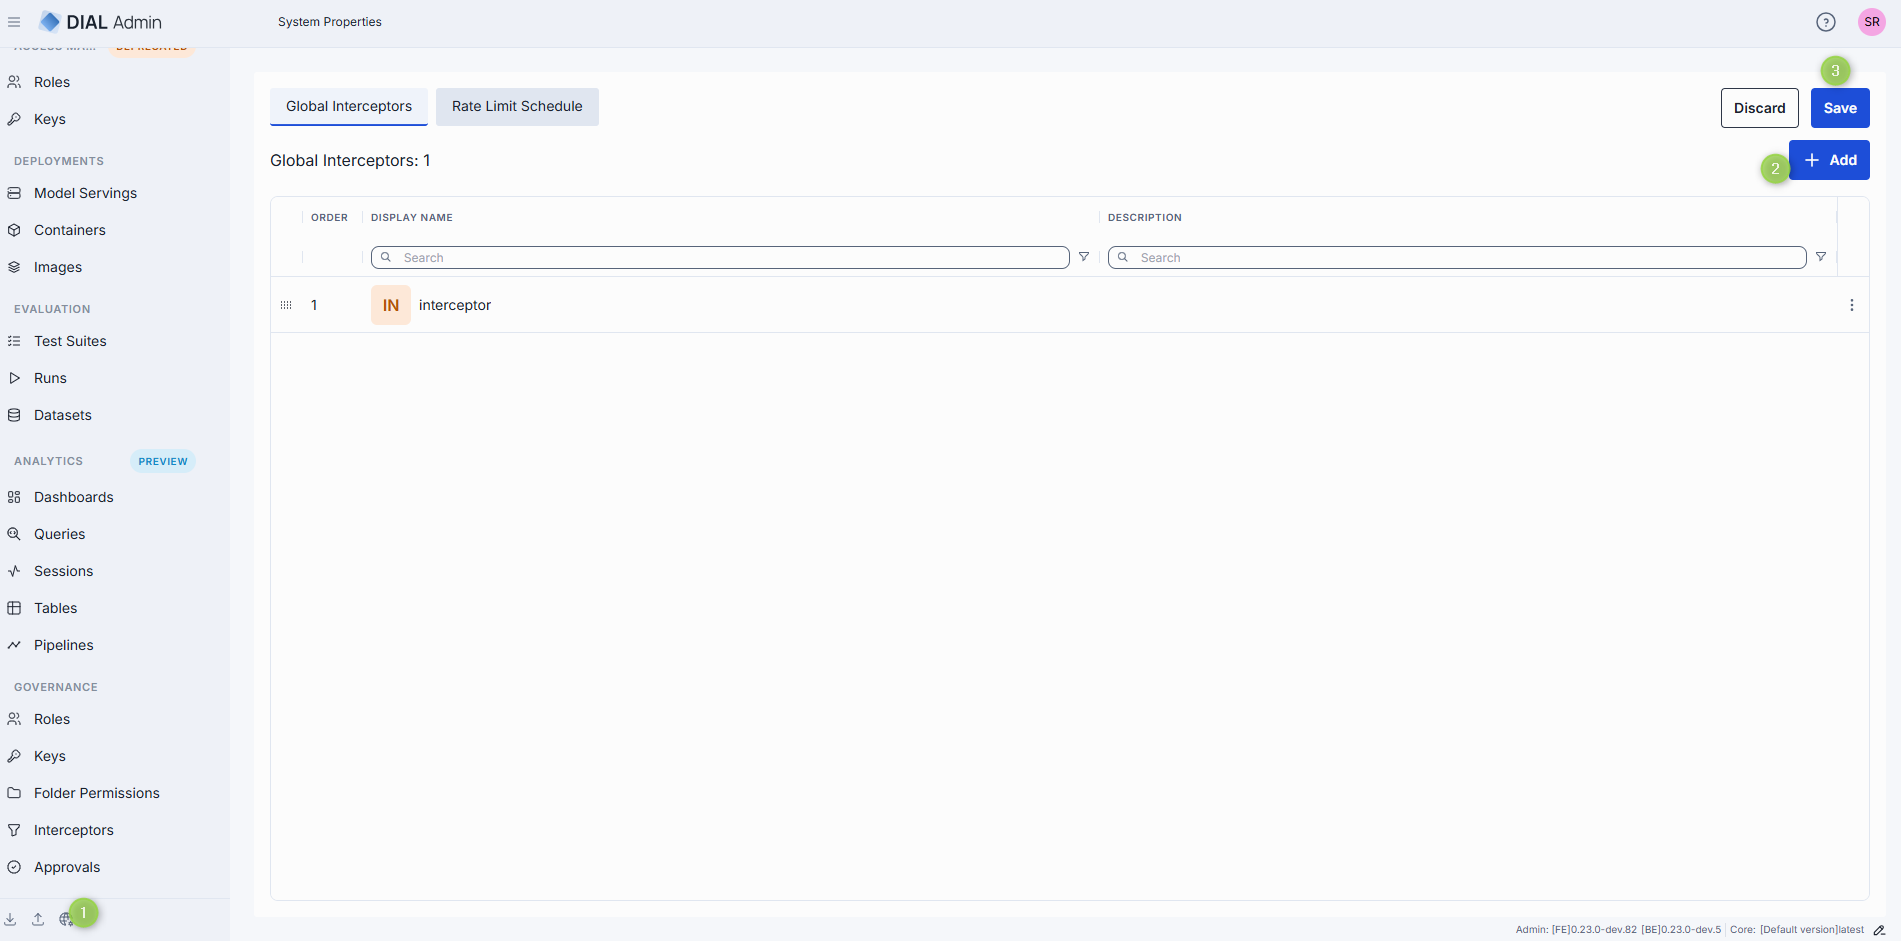
Click the Globe icon in the footer, or in Quick Actions on the home page, to open the System Properties screen, where you add and configure global interceptors.

Global interceptors apply to every deployment — applications and models — in DIAL. When local interceptors are also configured for a specific model or application, global interceptors process each request first, before the local interceptors, and review the response after the local interceptors have processed it.
To add a global interceptor:
- Click + Add on the System Properties screen.
- Select from the list of available interceptors.
- Click Apply to add the interceptor. Repeat to add more. When there is more than one, drag and drop to set the execution order. Interceptors run in ascending order (1 → 2 → 3). Requests flow through them in this order; response interceptors run in reverse.
- Click Save to apply, or Discard to cancel unsaved changes.
When a global interceptor is added, its status in Entities > Interceptors changes to Global, and it is listed under the Global Interceptors tab in the configuration of any application or model.
Set the DIAL Core version
Administrators can set the DIAL Core version manually to resolve compatibility issues that can arise during upgrades.
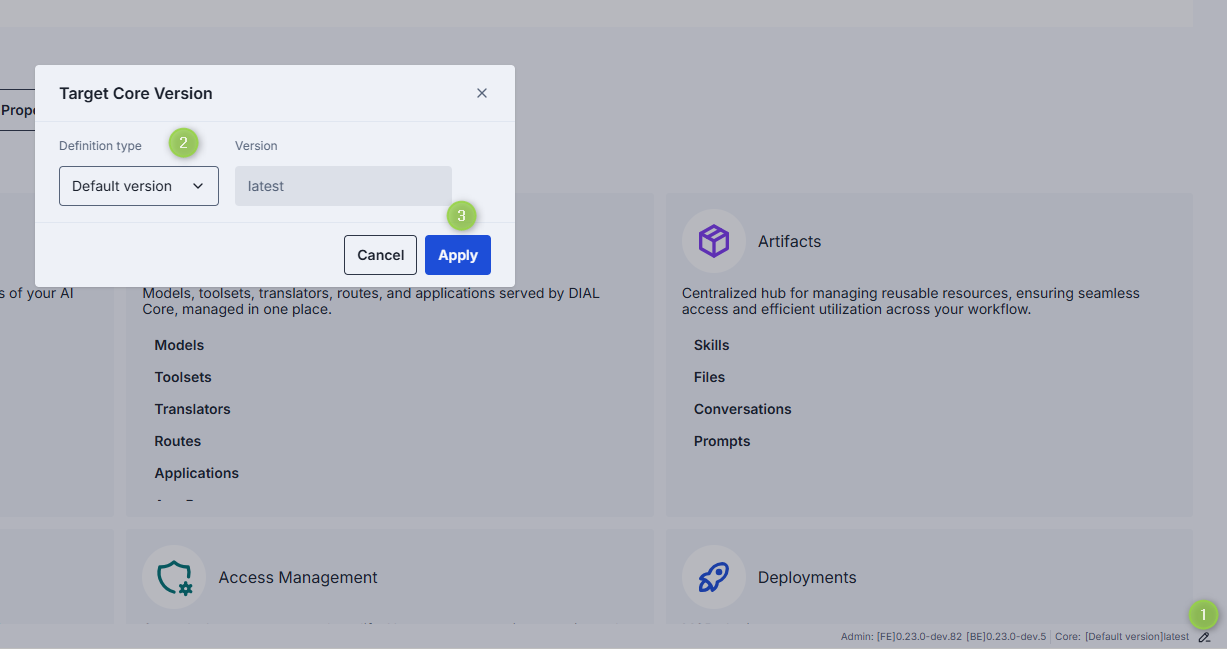
- Click the Edit icon in the footer next to the Core version.
- In the pop-up, enter the desired DIAL Core version manually, or choose to detect it automatically.
- Click Apply. The updated version appears in the footer.
Change user settings
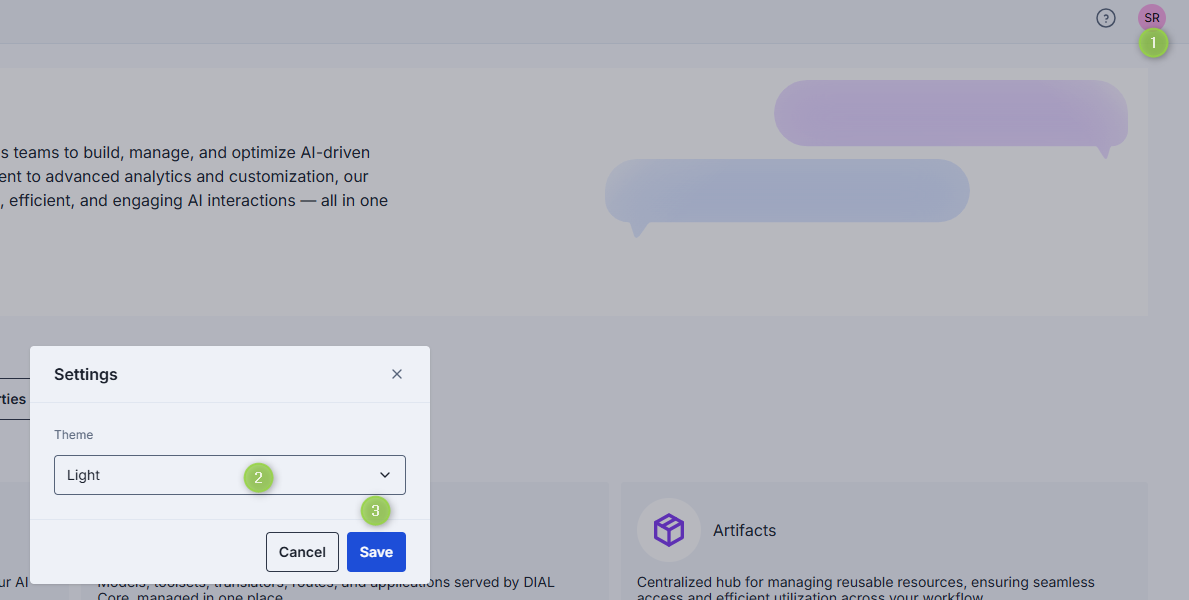
Click your avatar or name in the top-right corner of the header to open the profile menu, where you can sign in or out and select a UI theme.
Further reading
- Manage interceptors — register interceptors and attach them in DIAL Admin
- Configuration API — manage Core configuration entities while Core runs
- Admin Frontend configuration — environment variables of the Admin Frontend server
- Manage deployment images — add and configure the images that containers are built from