Manage API keys
This page explains how to create, duplicate, configure, rotate, and delete API keys in DIAL Admin. API keys allow external applications to authenticate with DIAL Core and access resources. You need administrator access to DIAL Admin to perform these tasks.
Note
API keys can also be defined directly in DIAL Core configuration. DIAL Admin manages the keys stored in the platform folder.
For background on access control, see Authentication and access control. To configure API key roles and rate limits, see Roles and rate limits.
Keys grid
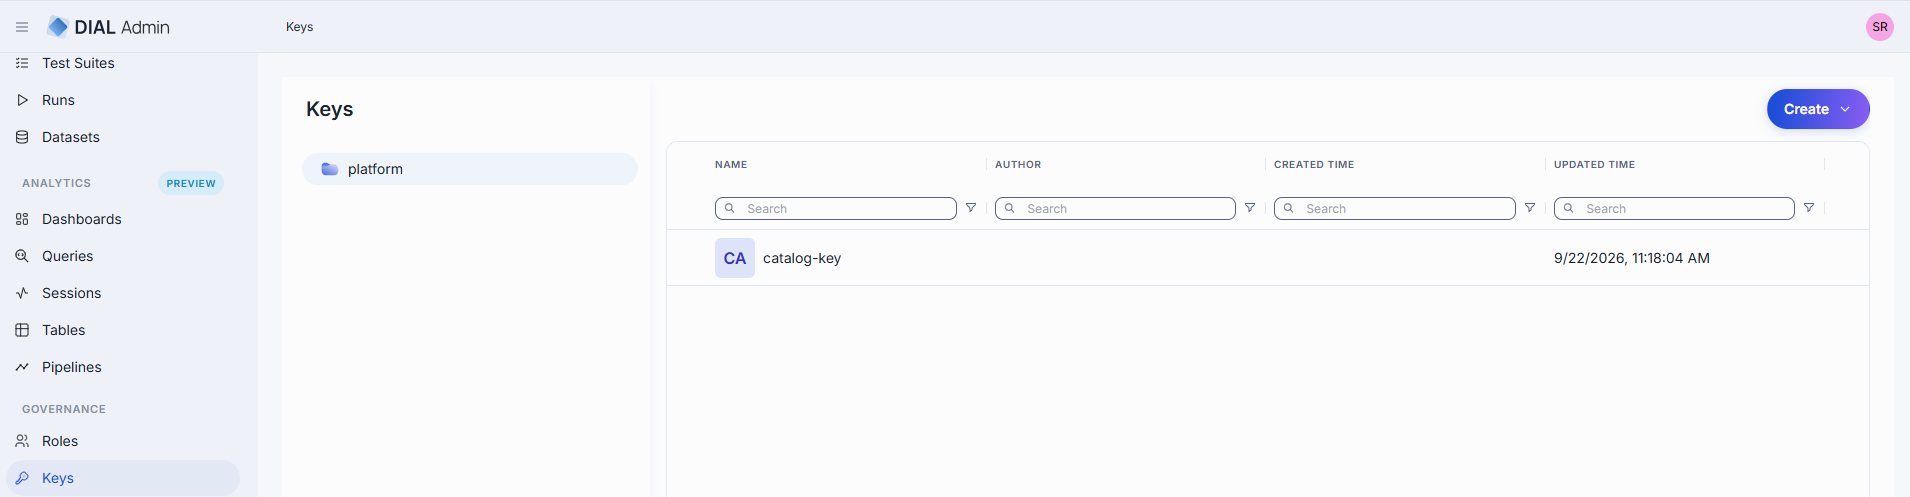
Navigate to Keys in the Governance section to see all API keys managed in DIAL Admin.
Folders
The left panel has a single root folder, platform. It holds the keys stored in DIAL Core platform storage, and you create, duplicate, edit and delete keys in it. Unlike Roles, Keys has no read-only file folder.
| Column | Description |
|---|---|
| Name | Key name displayed in the UI. |
| Author | User who created the key. |
| Created Time | Key creation timestamp. |
| Updated Time | Timestamp of the latest change. |
Actions
The actions menu (⋮) at the end of each row, and the checkboxes for selecting several rows, offer these actions. Bulk selection offers only Delete.
| Action | What it does |
|---|---|
| Open in a new tab | Opens the key's configuration screen in a new browser tab. |
| Duplicate | Creates a copy of the key with a new ID. See Duplicate. |
| Delete | Permanently removes the key. See Delete. |
Create
-
Click Create and select Key. The Create Key modal opens.
-
Specify the parameters for the new key and click Next:
Field Required Description ID Yes Unique key identifier. Project Yes Name of the project the key is created for. 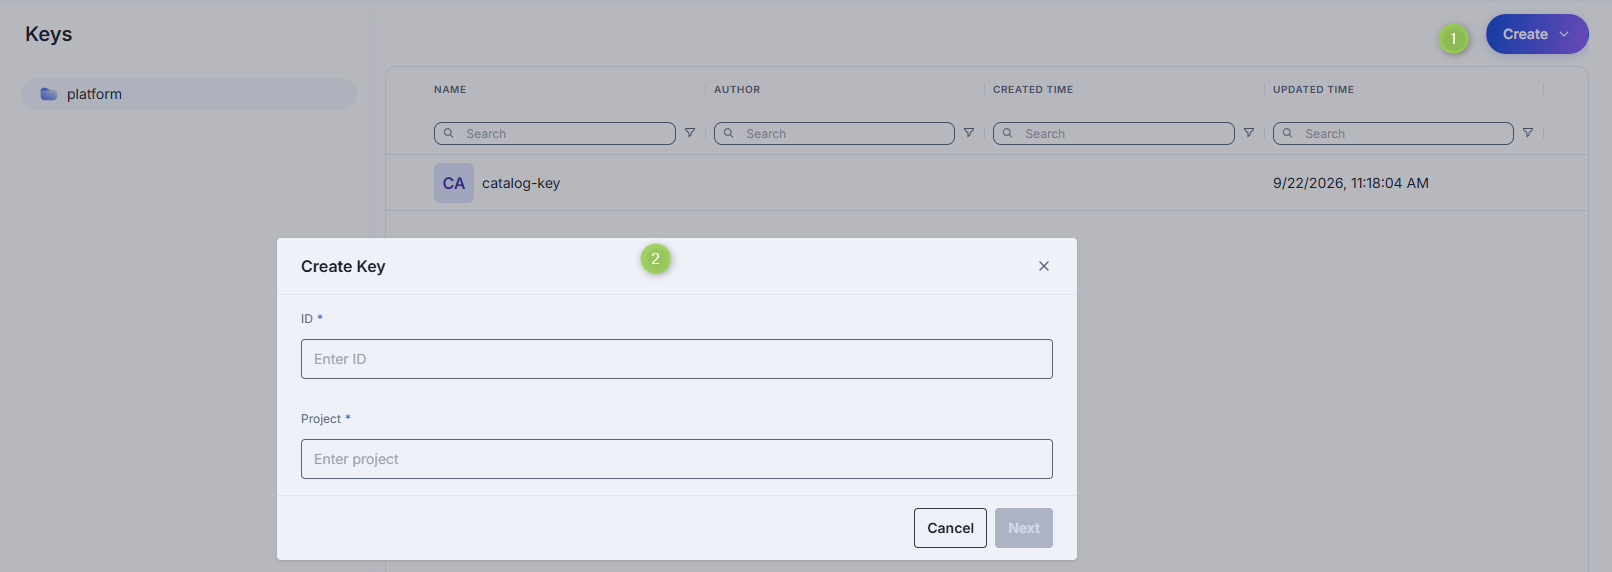
-
Select the roles this key grants to its bearer. At least one role is required. Click Create.
-
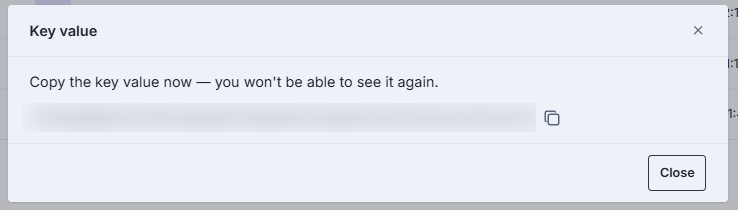
The Key value dialog shows the generated key value. Copy it to a secure location: you can't see it again after you close the dialog.
-
Click Close. The new key's configuration screen opens, and the key appears in the listing.
Duplicate
- Click Duplicate in the key's actions menu.
- Enter an ID for the copy and click Duplicate. The copy keeps the Project and Roles of the original.
- Copy the new key value from the Key value dialog. The copy gets its own key value, and you can't see it again after you close the dialog.
- Click Close. The configuration screen of the copy opens.
Delete
Click Delete in the key's actions menu on the main screen, or use the Delete button on the key's configuration screen, to permanently remove the selected key.
Warning
All entities (applications, models, routes) bound to the deleted API key will stop working.

Configuration
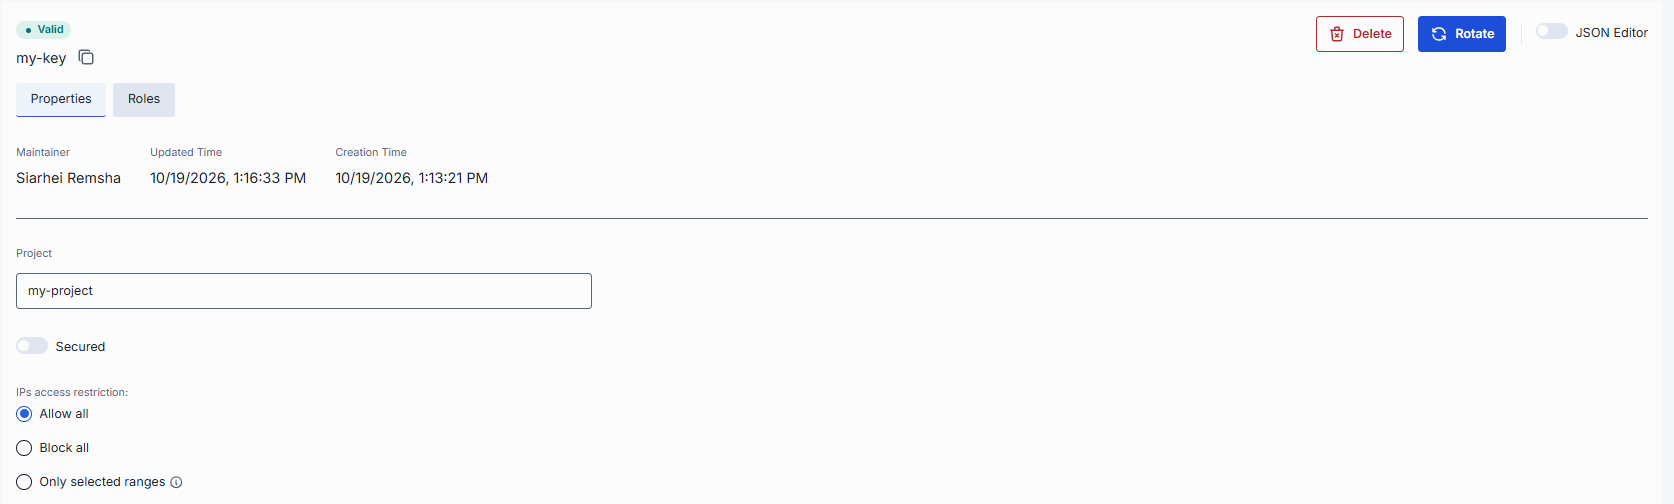
Click any key on the main screen to open its configuration screen. A badge above the key ID shows whether DIAL Core accepted the key: Valid, or Invalid with a tooltip that names the offending field and the reason. DIAL Core leaves an invalid key out of its served configuration. The screen has two tabs: Properties and Roles.
Key rotation
Use Rotate to replace the secret value of an existing API key without deleting it. Rotation deactivates the current key value, so clients that use it stop working until you give them the new value.
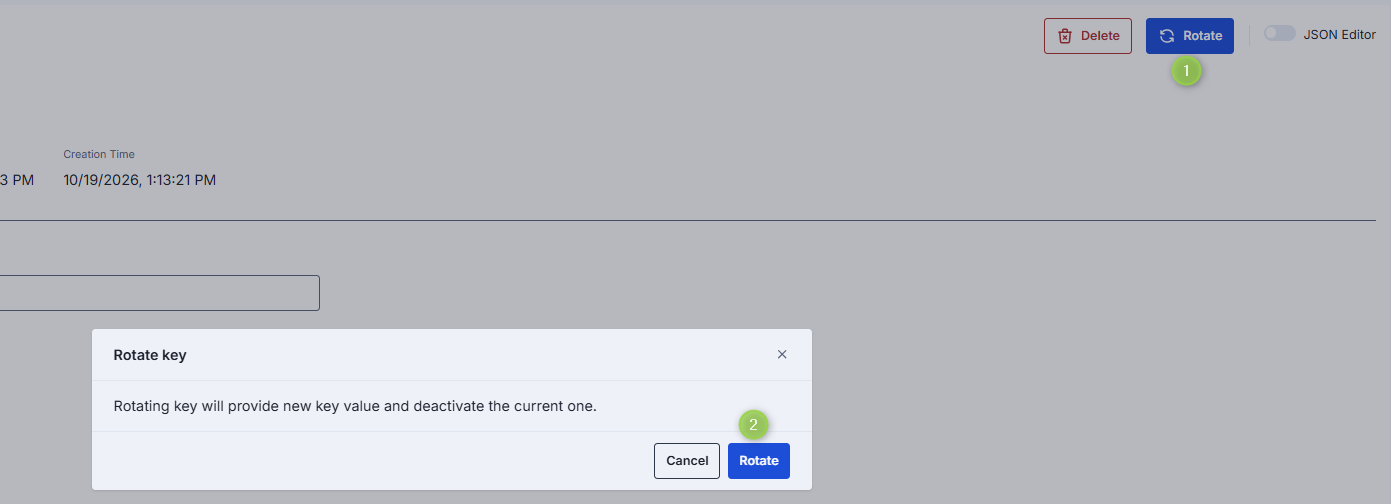
- Click the key to open its configuration screen.
- Click Rotate.
- The Rotate key dialog says: "Rotating key will provide new key value and deactivate the current one." Click Rotate.
- A dialog with the new key value opens up. Copy it to a secure location: you can't see it again after you close the dialog.
- Click Close to complete rotation.
Properties
The Properties tab shows metadata and editable settings for the selected API key.
| Field | Required | Description |
|---|---|---|
| ID | — | Unique key identifier. |
| Maintainer | — | User who create the key. |
| Updated Time | — | Timestamp of the last update. |
| Creation Time | — | Key creation timestamp. |
| Project | Yes | Name of the project the key was created for. |
| Secured | Yes | Indicates whether this is a secured API key. |
| IPs access restriction | No | List of IP address ranges controlling which clients can use this key. — Allow all or undefined: any client has access. — Block all: no client has access. — Only selected ranges: only clients with an IP address within the specified ranges can access. Supports IPv4 and IPv6. On save, each range is normalized to its network address: host bits outside the prefix are dropped. For example, 192.168.1.1/2 is stored and shown back as 192.0.0.0/2. |
Roles
The Roles tab lists the roles this key grants to its bearer. A key must have at least one role. Use it to assign existing roles to the key. Roles set the limits that apply to requests made with the key.
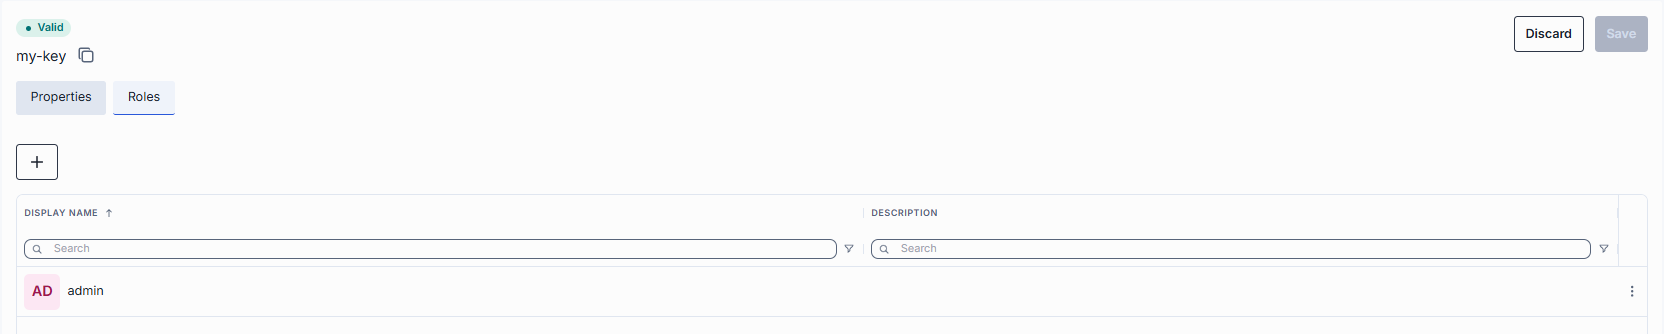
| Column | Description |
|---|---|
| Display Name | Role name displayed in the UI. |
| Description | Description of the role. |
| Action | Description |
|---|---|
| Add (+) | Assign roles to this API key. |
| Remove | Disconnect the role from this key. To delete the role, go to Roles. |
JSON editor
Advanced users can view and edit key properties as raw JSON. This is useful for bulk updates, copying configuration between environments, or modifying settings not exposed in the UI.
Tip
You can switch between UI and JSON only when there are no unsaved changes.
To use the JSON editor:
- Navigate to Keys, select the platform folder, and select the key you want to edit.
- Click the JSON Editor toggle (top-right). The raw JSON is revealed.
- Make your changes and click Save.
Further reading
- Manage roles — create roles and set per-model token limits, cost limits and sharing limits
- Manage folders access — manage access to files in folders
- Configure API key authentication — issue an API key in Core and scope what it can reach
- Configure roles and rate limits — define roles with request, token, cost, and sharing limits
- Authentication and access control — the access-control model: authentication, objects, and subjects
- Manage models — add models to a role's entity list