Getting started with Code Apps
In this tutorial, you will create, deploy, and test your first Code App directly in the DIAL Chat browser interface. You will build a simple echo application that repeats the user's message. No local tools, terminal commands, or Docker setup required — everything happens in the browser.
Prerequisites
- Access to a DIAL Chat instance with Code Apps enabled
- A user role that allows creating Code Apps (contact your administrator if Add app is unavailable)
- Basic Python knowledge
What you will build
An echo application that receives a message through DIAL Chat and responds with the same text. The app runs as a platform-managed container — you write the code, and DIAL handles deployment and hosting.
Step 1: Open Application Builder
- In DIAL Chat, navigate to My workspace.
- Click Add app and select Code App.
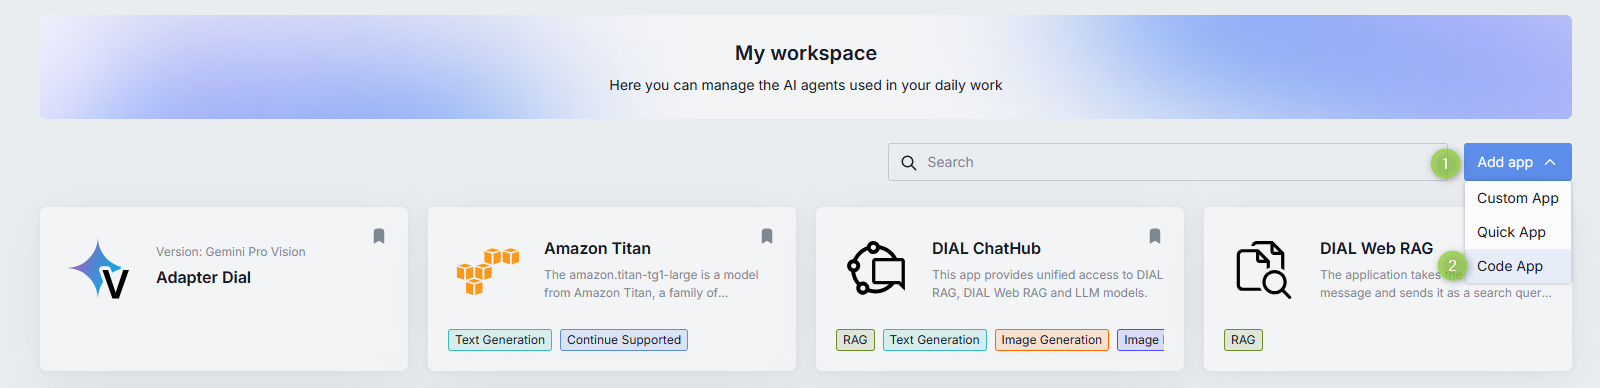
Application Builder opens with a configuration form and a Python code editor.
Use these values for the General Info section:
| Field | Value |
|---|---|
| Name | My Echo App |
| Version | 0.0.1 |
| Description | Simple app that echoes your message |
Step 2: Configure the app
Before using the code editor, please fill out the configuration form.
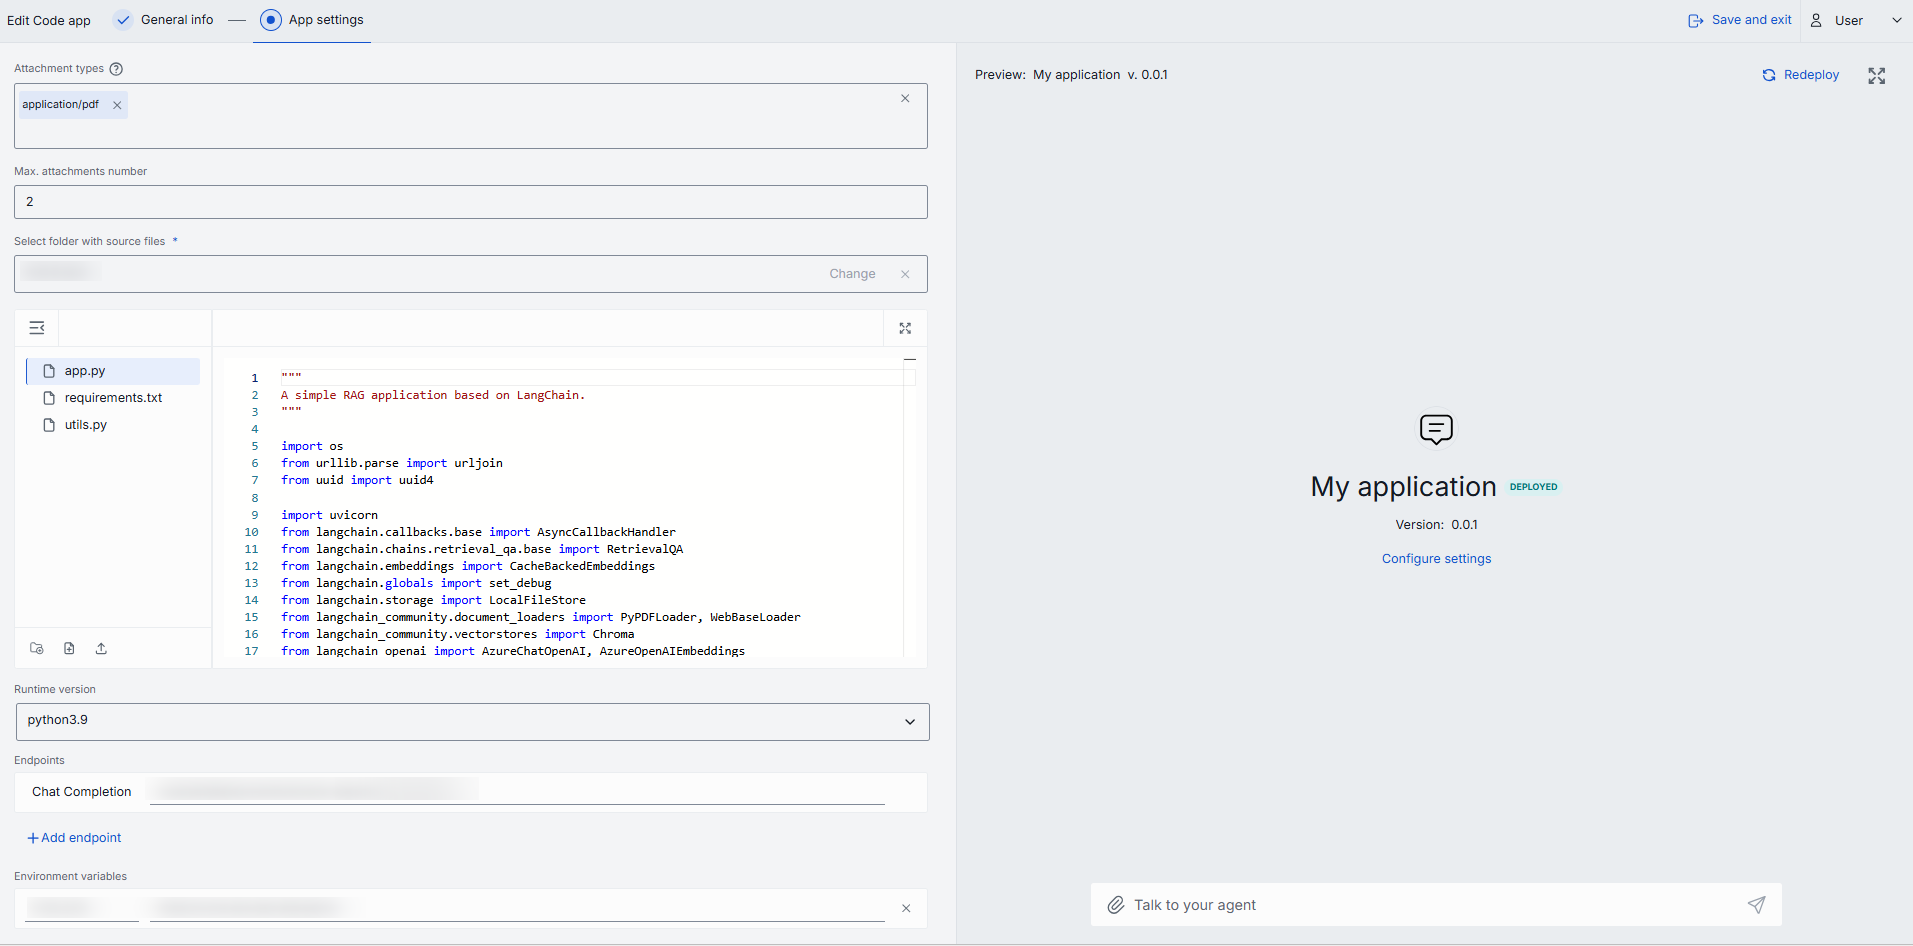
Leave other fields at their defaults. The full set of configuration fields:
| Field | Required | Description |
|---|---|---|
| Name | Yes | Display name for the Code App. |
| Version | Yes | Version string in x.y.z format (numbers and dots only). |
| Icon | No | Icon displayed in DIAL Chat and the Catalog. |
| Topics | No | Pre-defined topic tags. Topics and their styles are defined in DIAL Chat Themes. |
| Description | No | Short description shown in DIAL Chat and the Catalog. Add two line breaks for an extended description. |
| Attachment types | No | Allowed MIME types (e.g., image/png). Enter */* to allow all types. |
| Max. attachments number | No | Maximum number of attachments accepted. Leave empty for no limit. Enter 0 to disable attachments. |
| Select folder with source files | Yes | Opens the built-in Python code editor. Write code from scratch or upload existing source files. |
| Runtime version | Yes | Python runtime environment for code execution. |
| Endpoints | Yes | Chat completion endpoint (required). Rate and configuration endpoints are optional. |
| Environment variables | No | Key-value pairs accessible to the application at runtime. |
Step 3: Write the application code
In the built-in code editor, create a file named app.py with the following content:
# Save this as app.py
import uvicorn

from aidial_sdk import DIALApp
from aidial_sdk.chat_completion import ChatCompletion, Request, Response

# ChatCompletion is an abstract class for applications and model adapters
class EchoApplication(ChatCompletion):
    async def chat_completion(self, request: Request, response: Response) -> None:
        # Get last message (the newest) from the history
        last_user_message = request.messages[-1]

        # Generate response with a single choice
        with response.create_single_choice() as choice:
            # Fill the content of the response with the last user's content
            choice.append_content(last_user_message.text())


# DIALApp extends FastAPI to provide a user-friendly interface for routing requests to your applications
app = DIALApp()
app.add_chat_completion("echo", EchoApplication())

# Run built app
if __name__ == "__main__":
    uvicorn.run(app, port=5000)
Key elements in this code:
ChatCompletion— base class for all DIAL applications. You implement one method:chat_completion.Request— contains the conversation history.request.messages[-1]is the most recent user message.Response— the object you write output to.create_single_choice()opens a response stream with one choice.DIALApp— a FastAPI-based application router.add_chat_completion("echo", ...)registers your handler under the deployment nameecho.
Update "Endpoints -> Chat Completion" with:
/openai/deployments/echo/chat/completions
Also, create a file named requirements.txt in the same folder and add dependencies:
aidial-sdk
Click Save and exit to register the app in DIAL.
Verify: The app appears in My workspace with a red status icon (undeployed).
Step 4: Deploy the app
- In My workspace, find your Code App and open its context menu (three dots).
- Click Deploy.
- Wait for the status icon to change from yellow (deploying) to green (deployed). This may take a few minutes while the platform builds the container.

Verify: The status icon is green, indicating the app is running.
Step 5: Test in DIAL Chat
- Select the deployed Code App in My workspace.
- Click Use application to start a new conversation.
- Type a message — for example,
Hello, DIAL!— and send it.
Verify: The app responds with the exact text you sent: Hello, DIAL!.
Step 6: View logs
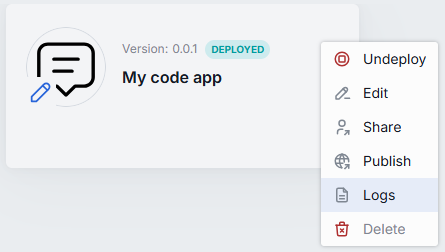
- Open the context menu for your deployed Code App.
- Click Logs.
A pop-up window displays the application logs. You can refresh and download the log file from this window.
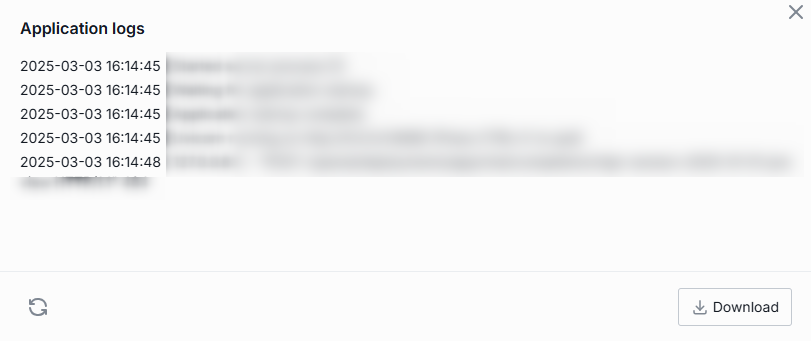
Verify: The logs show request activity from your test message.
What you learned
- How to create a Code App using Application Builder in DIAL Chat.
- How to write a DIAL-compatible Python application using the
ChatCompletionbase class. - How to configure, deploy, and test a Code App entirely in the browser.
- How to access application logs for debugging.
Demo video
For a visual walkthrough of Code Apps, including a more advanced RAG example, watch the demo video:
Further reading
- Tutorial: build a RAG Code App — create a retrieval-augmented generation app with file upload and model calls
- DIAL App Builder Python — how Code App sources are validated for image builds
- DIAL App Controller — how App Controller builds and runs Code Apps
- What are Quick Apps — use your Code App as a tool in no-code workflows