Integration with Microsoft Excel
In this tutorial, you'll install the DIAL Add-in for Microsoft Excel and call a DIAL model straight from a spreadsheet cell. By the end, a formula in your worksheet will return a model's answer, and a second formula will list the models available to you. This tutorial is for developers and power users who already have access to a running DIAL instance. No prior add-in experience is needed.
Tip
Watch a demo video to see the add-in in action before you start.
Prerequisites
This tutorial assumes the add-in is already deployed for your organization. Installing it on a clean machine is not part of this tutorial — your administrator deploys the add-in and gives you its manifest file. Before you begin, make sure you have:
- A deployed DIAL Add-in for Microsoft Excel instance and a running DIAL Core, both reachable from your machine.
- The add-in
manifest.xmlfile, provided by your administrator. - Microsoft Excel — the desktop client or Excel on the web.
- A DIAL account. The add-in signs you in through your organization's identity provider. For background, see Auth and access control and, for the default provider, Keycloak.
What you'll build
By the end of this tutorial, a spreadsheet cell will hold a live model response generated by the Dial.ASK function:
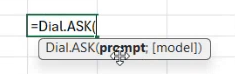
The add-in provides two functions:
Dial.ASK— sends a prompt to a model or application in DIAL and returns the response.Dial.LISTMODELS— returns the models and applications available to your account.
Step 1: Sideload the add-in
Sideload the add-in into Excel using the manifest.xml file from your administrator. The manifest registers the add-in's functions and points Excel at the add-in backend.
- Open Excel.
- Load the
manifest.xmlfile using the sideloading method for your platform. For the exact steps on Windows, Mac, and Excel on the web, follow Microsoft's sideload an Office Add-in guide.
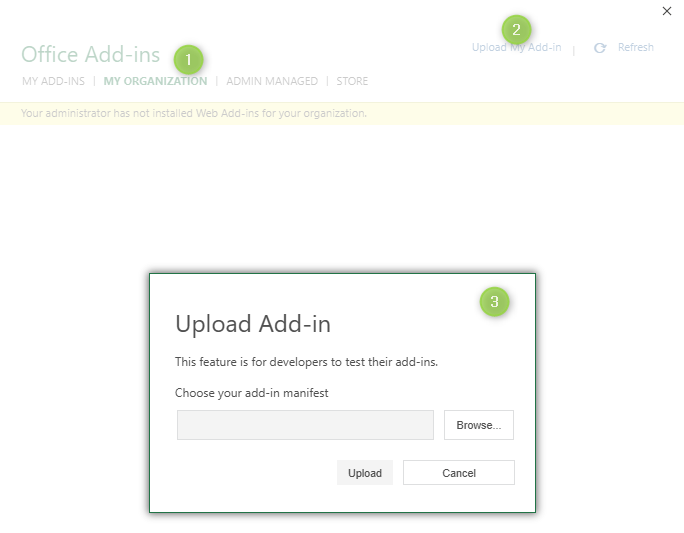
Verify: The DIAL Add-in appears on the Excel ribbon, and typing =Dial. in a cell offers Dial.ASK and Dial.LISTMODELS in the formula autocomplete.
Step 2: Sign in and choose a model
The add-in calls DIAL on your behalf, so you authenticate once before using the functions.
- Open the add-in pane from the ribbon and start the sign-in flow.
- Sign in with your organization's identity provider. After authentication, the add-in receives a token and uses it to authorize requests to DIAL Core.
- Open the add-in settings dialog and select a default model or application. The functions use this model when a formula does not name one explicitly.

Verify: The settings dialog shows your selected model, and the add-in pane indicates you are signed in.
Step 3: Run your first Dial.ASK formula
Send a prompt to your selected model directly from a cell.
-
In cell
A1, enter some source text — for example,DIAL is an enterprise platform for orchestrating language models. -
In cell
B1, enter the following formula:=Dial.ASK("Summarize this in five words: " & A1) -
Press
Enter.
To target a specific model instead of the default, pass its deployment name as an argument. Excel's formula autocomplete shows the exact argument order as you type.
Verify: Cell B1 shows a model-generated summary of the text in A1. Editing A1 and recalculating updates the response, the same as any other Excel formula.
Step 4: List available models with Dial.LISTMODELS
Discover which models and applications your account can reach.
-
In an empty cell, enter the following formula:
=Dial.LISTMODELS() -
Press
Enter.
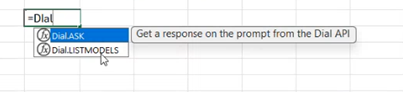
Verify: The formula returns a spilled list of model and application names. Each name is valid as the model argument to Dial.ASK.
How it works
Excel talks to the add-in backend through the endpoints declared in the manifest. The backend calls DIAL Core over the Unified API — the list deployments endpoint backs Dial.LISTMODELS, and the chat completion endpoint backs Dial.ASK. Your identity token travels with each request, so DIAL enforces the same role-based access control it applies everywhere else.
Further reading
- Integration with MS Teams — bring DIAL into your messaging platform
- Configure Keycloak — connect DIAL to a Keycloak realm
- Auth and access control — the guides for authenticating callers and controlling access
- Integration demos — demos of DIAL in editors, productivity apps, and automation
- Embed AI in existing tools — reaching users inside Teams, Excel, and automation tools
- Unified API reference — the API the add-in calls into DIAL