Tutorial: build an agent with a Toolset
In this tutorial you build a Research Assistant: a Quick App that answers questions with live data from an MCP server. You register the server as a Toolset, create the agent in DIAL Chat, and watch it call tools in an agent loop. It is for developers new to Quick Apps. You need a DIAL Chat account and an MCP server you can reach; no code is involved.
What you will build
A Research Assistant that:
- Takes a question from the user
- Calls tools from your Toolset to gather data
- Answers with the results, citing where they came from
Each tool call shows as a stage in the chat, so you can see what the agent did.
Prerequisites
- An account in DIAL Chat, with the Quick App editor deployed. See DIAL Quick Apps.
- A model in your DIAL deployment that supports tool calls.
- An MCP server reachable from DIAL, over HTTPS, with its URL and any credentials it needs. It can be any server your organization runs, such as a search service or an internal API.
Step 1: Register the MCP server as a Toolset
- In the Catalog, click Create and choose Toolset.
- In Metadata, enter the name
My Search Toolsand the descriptionSearch and data tools for the Research Assistant. - In Setup, enter the server's Endpoint, and choose the Protocol it speaks: HTTP or SSE.
- Optionally, list the Allowed tools to expose only some of the server's tools.
- Under Authentication, choose Open access, OAuth, or API Key, to match the server.
- Click Create.
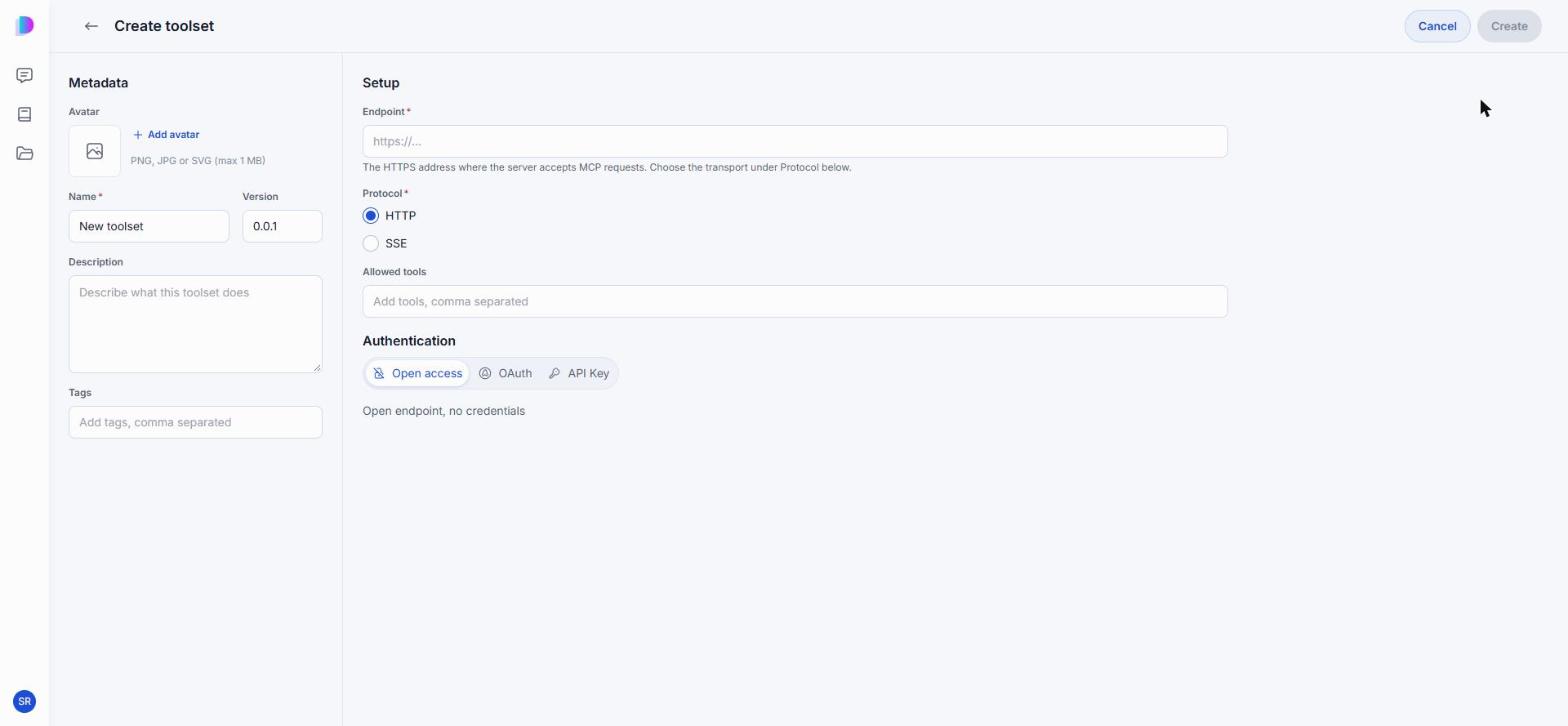
The Toolset is in your private folder. Each authentication option is explained in Create a toolset.
Step 2: Create the Quick App
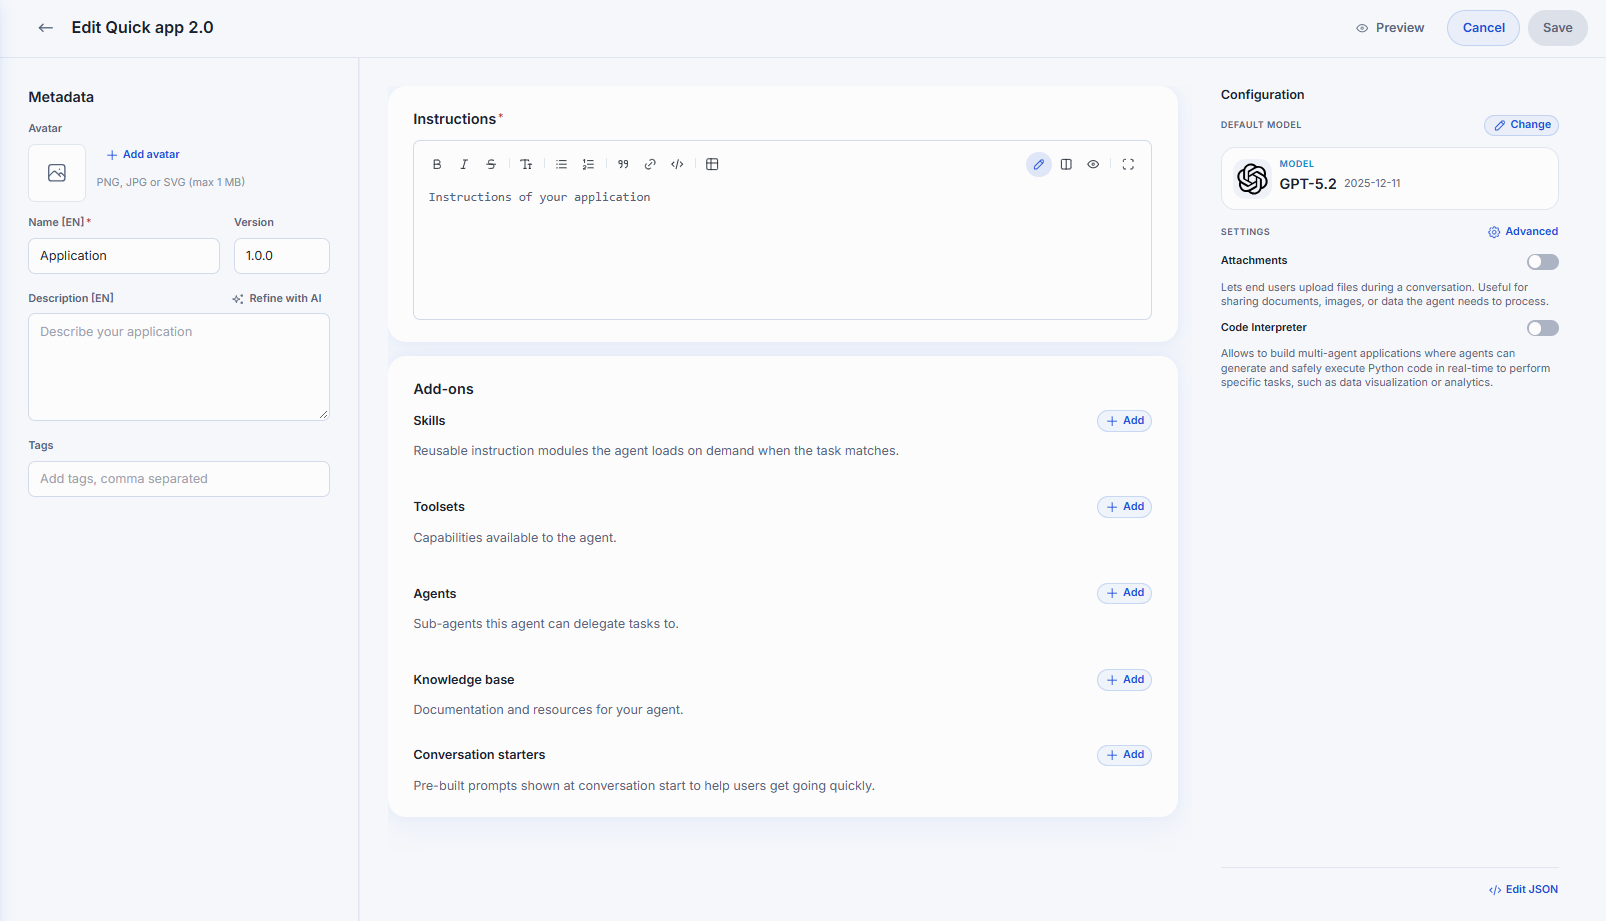
- In the Catalog, click Create and choose Quick App under Runners.
- In Metadata, enter the name
Research Assistant, the version1.0.0, and the descriptionAnswers research questions with live data.
Step 3: Write the instructions
In Instructions, paste:
You are a Research Assistant. Answer user questions accurately with the tools available to you.

- Use the tools to gather data before answering.
- If a tool call fails, say so, and give the best answer you can without it.
- Cite the source of every tool result you use.
- Be concise. Prefer bullet points to paragraphs.
Step 4: Add the Toolset
- In Add-ons, in the Toolsets row, click Add.
- Select
My Search Tools, and confirm. - If the row says "Authorize to use this toolset", click the Toolset and sign in on its Authentication tab.
Step 5: Choose the model and temperature
- In Configuration, under Default model, click Change and select a model that supports tool calls.
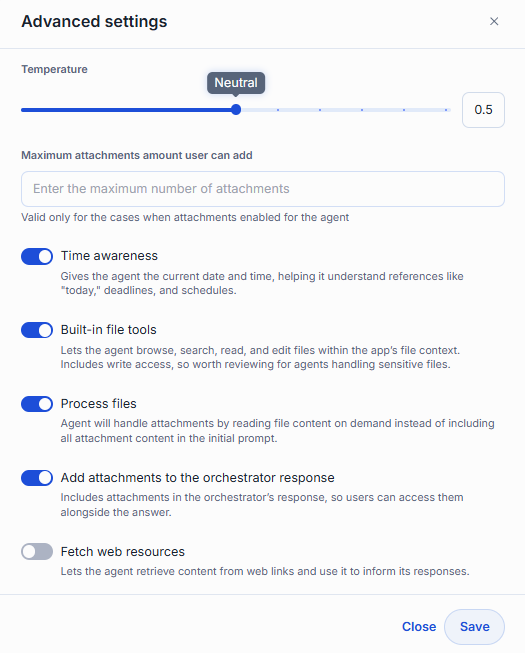
- Under Settings, click Advanced.
- Move Temperature toward Precise, for consistent, factual answers, and click Save.
Step 6: Test the agent loop
- Click Preview. DIAL Chat saves the agent and opens it in preview mode.
- Ask a question that needs one of your server's tools.
The agent should:
- Decide to call a tool from
My Search Tools. - Show the call as a stage in the answer. Expand it to see the arguments and the result.
- Use the result in its answer, and cite it.

To change something, click Back to setup, edit, and preview again.
Step 7: Save the agent
Click Save. The agent is in your private folder, visible only to you, until you share or publish it.
What you learned
- How to register an MCP server as a Toolset in DIAL Chat
- How to build a Quick App from a model, instructions, and a Toolset
- How the agent loop calls tools and shows each call as a stage
- How to preview an agent before you save it
Further reading
- Build a Quick App — every editor setting: skills, agents, a knowledge base, and starters
- Create a Quick App through the API — the same kind of agent, created with
curl - Quick Apps capabilities — what happens behind each setting
- DIAL Quick Apps — the two services behind Quick Apps and how they fit together
- Chat User Guide: Toolsets — connect MCP servers as Toolsets and sign in to them