Integration of DIAL with Continue
Introduction
DIAL is an open platform that integrates with external systems, libraries, and frameworks to enhance and extend their existing functionalities. This document explains the integration of DIAL with the Continue extension for Visual Studio Code (VS Code) - AI-powered code assistant, similar to a copilot.
The purpose of this integration is to enable VS Code users use the Continue code assistant with DIAL models.
This implementation also serves as a practical example of DIAL's integration with other systems.
DIAL Extension
To enable this integration, we developed a VS Code extension that automatically modifies the Continue's VS Code extension config.json file with configuration data from DIAL Core, based on the authenticated user (e.g., logged-in user and access tokens). This way a DIAL user can use Continue code assistant with DIAL models available to this user and within limits defined in DIAL Core configuration.
Watch a demo video to see this integration in action.
Features
These are the main features of the DIAL VS Code extension:
- Secure Authentication: The extension uses the PKCE flow with Keycloak for a secure authentication of users.
- Automatic Token Management: It refreshes tokens automatically before they expire to ensure uninterrupted access.
- Configuration File Generation: The extension automatically creates configuration files required for Continue based on DIAL Core settings.
- Customizable Settings: The extension's configuration allows you to define settings specific for your DIAL environment: authentication hosts, realms, and client IDs.
Installation
DIAL Plugin is not available on the Visual Studio Marketplace, follow these steps to install it manually:
-
Send us a request to get the latest
.vsixfile. -
In VS Code Extensions, click on the three-dot menu in the top right corner of the Extensions pane and select Install from VSIX.... Run the
.vsixfile to install both DIAL and Continue extensions.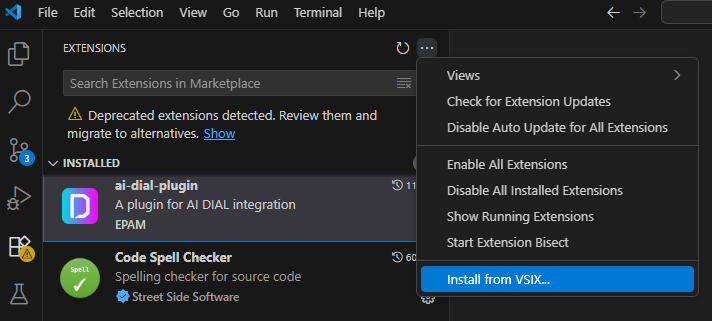
-
Reload VS Code to activate the extension.
-
Click Ctrl+Shift+P (Cmd+Shift+P on macOS) to open the Command Palette and type in
AI DIAL: Authto authenticate with DIAL. Once authenticated, the extension will automatically generate the necessary configuration files for Continue, allowing you to use DIAL models with the Continue extension.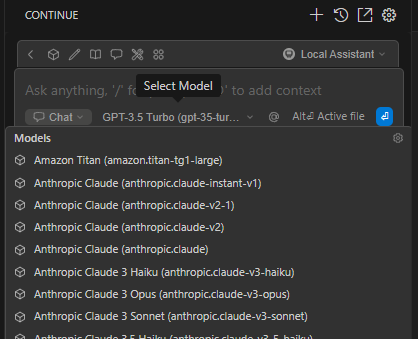
Settings
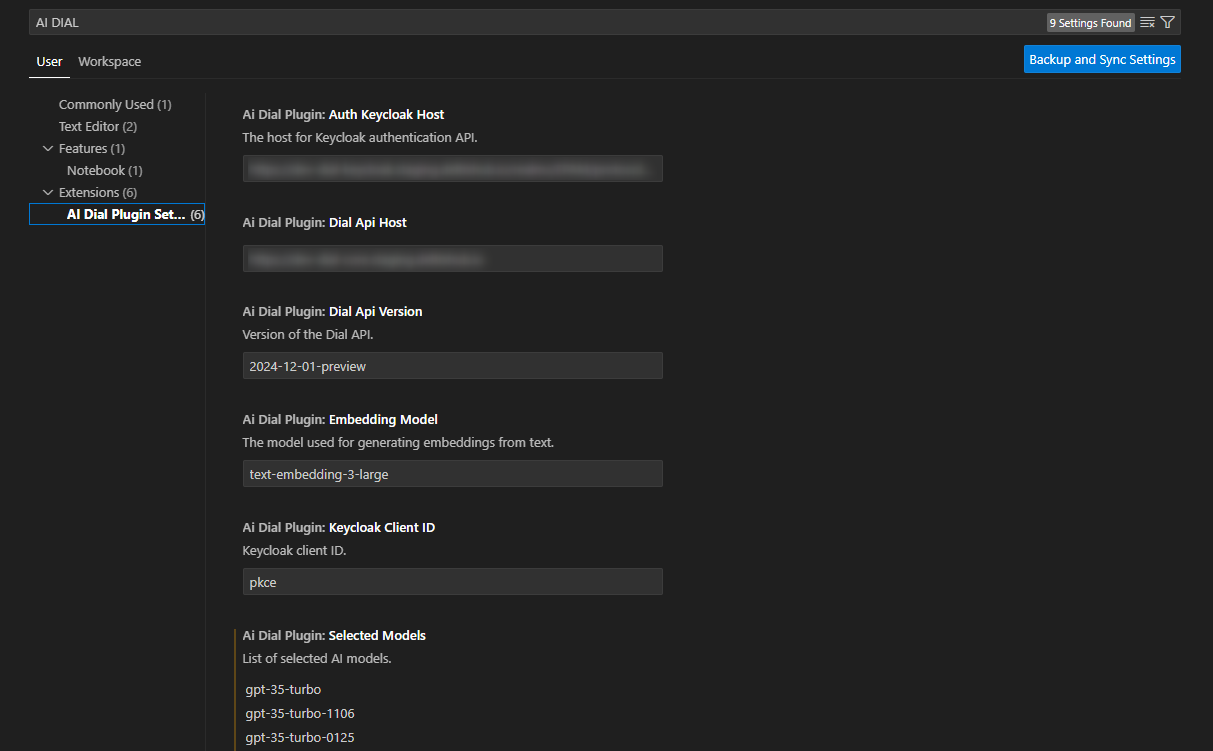
To configure settings, navigate to File > Preferences > Settings (Code > Preferences > Settings on macOS) and search for the DIAL plugin in the search bar.
The extension allows you to set the following configuration options:
| Setting | Type | Default | Description |
|---|---|---|---|
aiDialPlugin.authKeycloakHost | String | Auth host | The Keycloak authentication API host. |
aiDialPlugin.keycloakClientId | String | pkce | The Keycloak client ID. |
aiDialPlugin.dialApiHost | String | Dial host | The DIAL API host. |
aiDialPlugin.dialApiVersion | String | 2024-02-01 | The version of the DIAL API. |
Commands
In VS Code, press Ctrl+Shift+P (Cmd+Shift+P on macOS) to open the Command Palette and type in AI DIAL to see the available commands:
| Command Name | Description |
|---|---|
| AI DIAL: Reset Configuration | Use to reset the extension's configuration to default. |
| AI DIAL: Select AI Models | Select models that will become available in your extension. |
| AI DIAL: Auth | Use to authenticate with DIAL. |
| AI DIAL: Update Models | Use to update the list of models. |
